Global warming and Go Green being need of hour. Without printing the documents on the paper, Sage 300 introduced new feature which supports SMTP email feature. As in today’s business the need of efficient communication and organized documentation electronic emailing feature has proven to be very helpful means for achieving the same.
In today’s blog we will be discussing about the helpful feature of Sage 300 ERP that has been included in Sage 300 v2017 PU2 for the classic desktop as well web screens.
New Stuff: Solution to License Issue in Sage 300 ERP
Navigating to the screen:
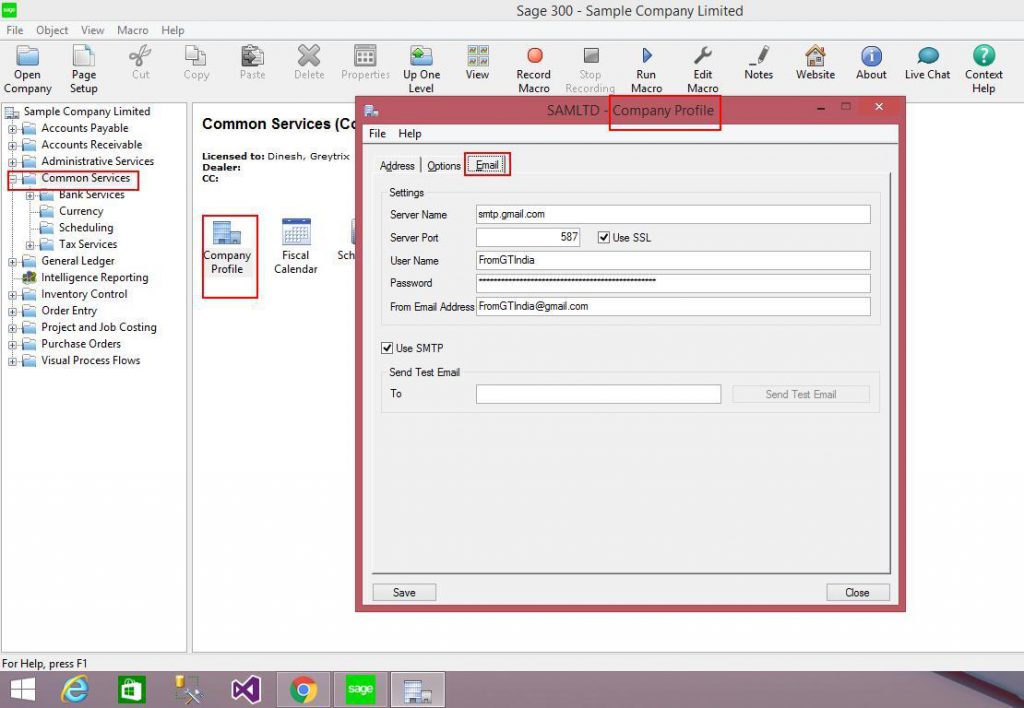
Sage 300 v2017 classic desktop:
In order to access the screen navigates to Common Services –> Company Profile screen–> Email Tab. Kindly refer to the screenshot below for the same.
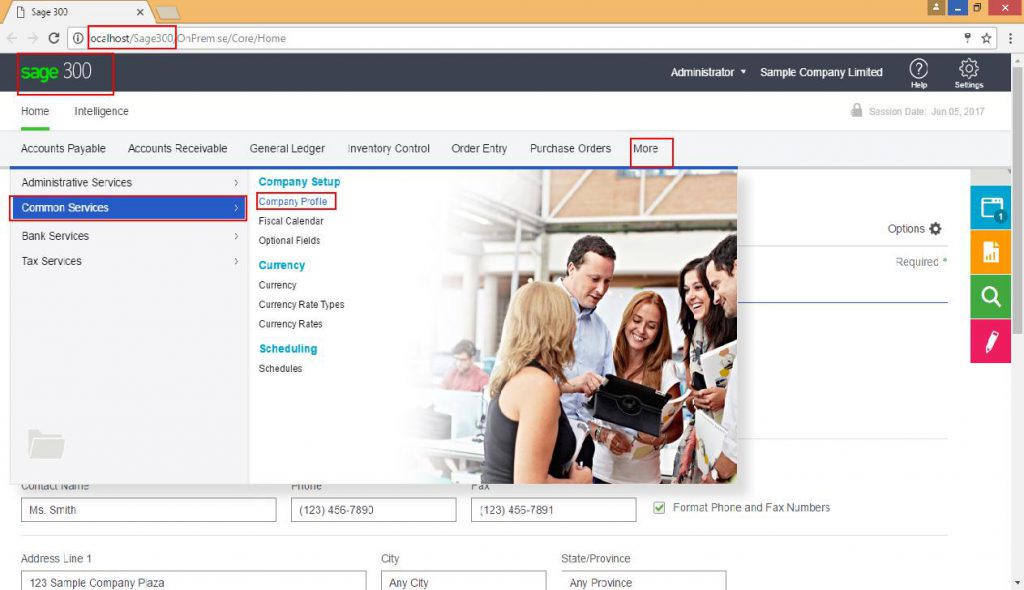
Sage 300C web screens:
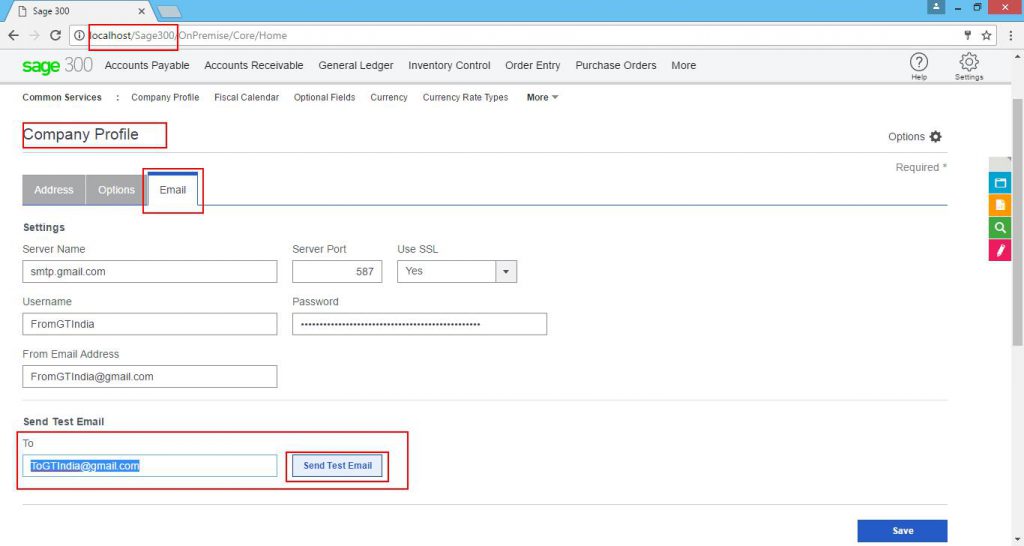
In order to access the screen navigates to More –> Common Services –> Company Profile –> Email Tab. Kindly refer to the screenshot below for the same.
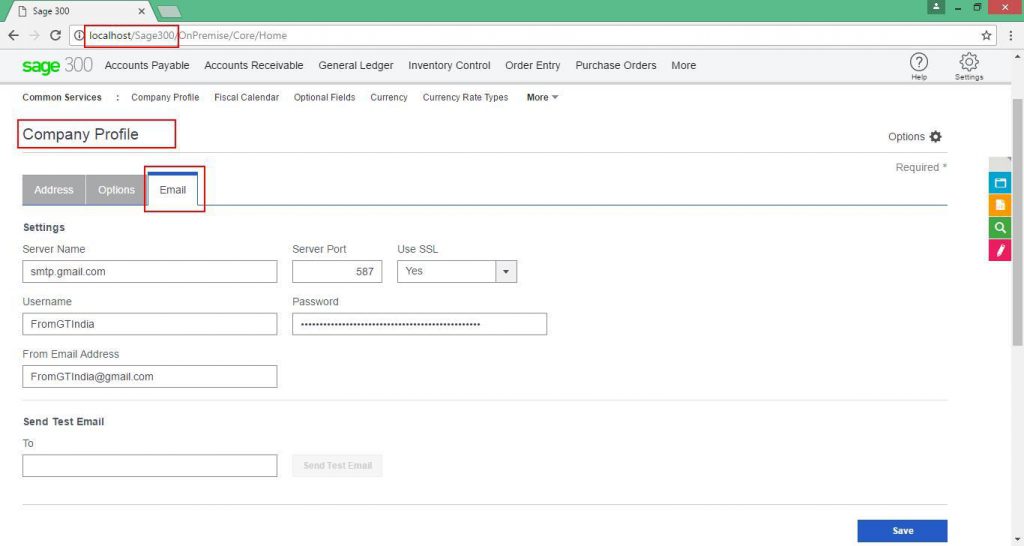
As displayed in above screenshots an additional “Email” tab is provided on the Company Profile screen. User can set or predefines below set of values which can be used in various emailing process in Sage 300 e.g. “Report ‘.pdf’ files emailing” etc.
Server Name:
A text field is provided where user can enter the email sever name to be used. The format to specify the server name should be “smtp.Server Name” e.g. if you are using gmail server for emailing you can specify the server name as “smtp.gmail.com”.
Server Port:
Here user needs to specify the port to be used for sending email.The default value is 587, but you can change it.
It is recommended using Port 587 while using SMTP services with (send grip) to avoid potential rate limiting or blocking. Port 465 can also be used but SSL should be set to true.
Use SSL:
The default value for this is “Yes”. User can any time change it as per requirement.It is recommended to make changes in these settings with the help of “SMTP Server Documentation” or consult the IT professional as this settings affects data encryption and authentication.
User Name: Enter the username for the SMTP server to be used when sending email as a from email account i.e. as sender.
Password: Enter the password for the email account to be used when sending email as a from email account i.e. as sender.
From Email Address: Enter the email address to be used when sending email as a from email account i.e. as sender.
Note: Depending on the SMTP server you use, this address may need to match the one you enter in the Username field, or may not work unless you set up an email alias. Consult your SMTP server documentation for details about sending email.
Use SMTP: User need to select this option i.e. need to set this check box checked if user is going to user SMTP services for email sending otherwise clear the selection if user is going to user other than SMTP services i.e. Microsoft outlook etc.
To: Here user need to specify the ‘To’ email id for the test email.
This tab allows user to set default SMTP email settings that will be used when user selects Email option while printing various documents (reports).
Note:
User can able to change these settings any time.
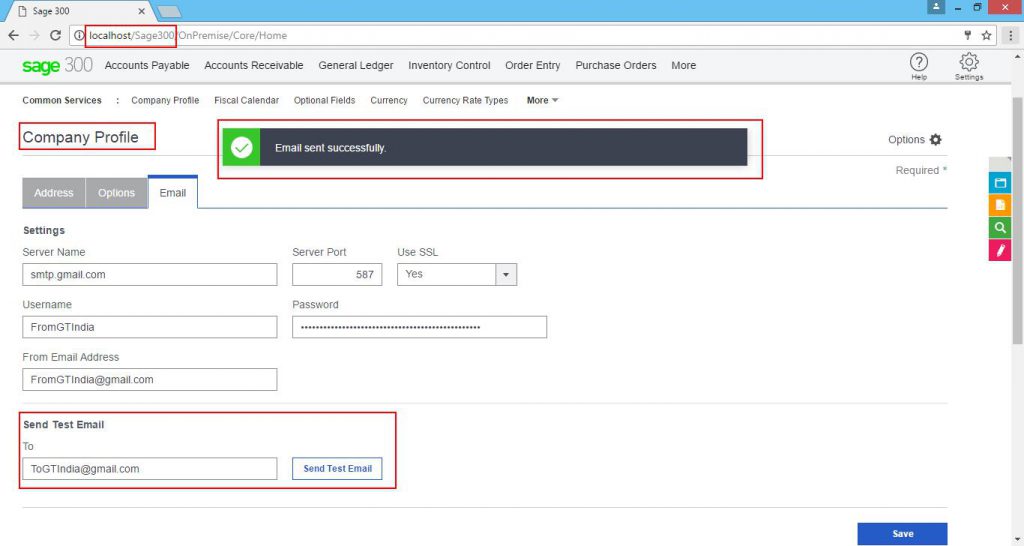
Active internet connection is needed while using these settings made for successful emailing process.User can be able to verify the settings made are proper or not by sending test email from this screen. Please find below screenshot for reference:
 On successful email sending message will be displayed as below.
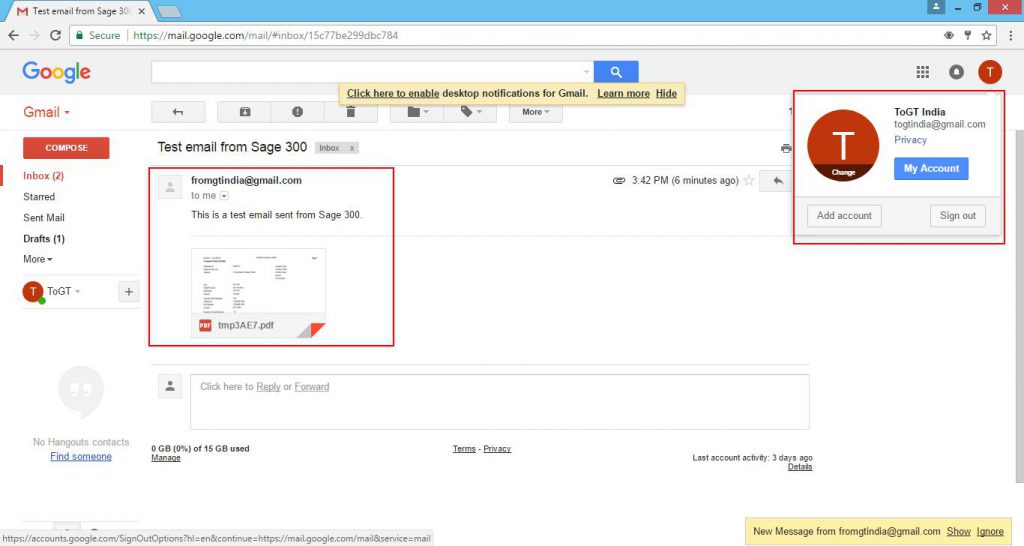
Test email will be received on the “To” email account as below:
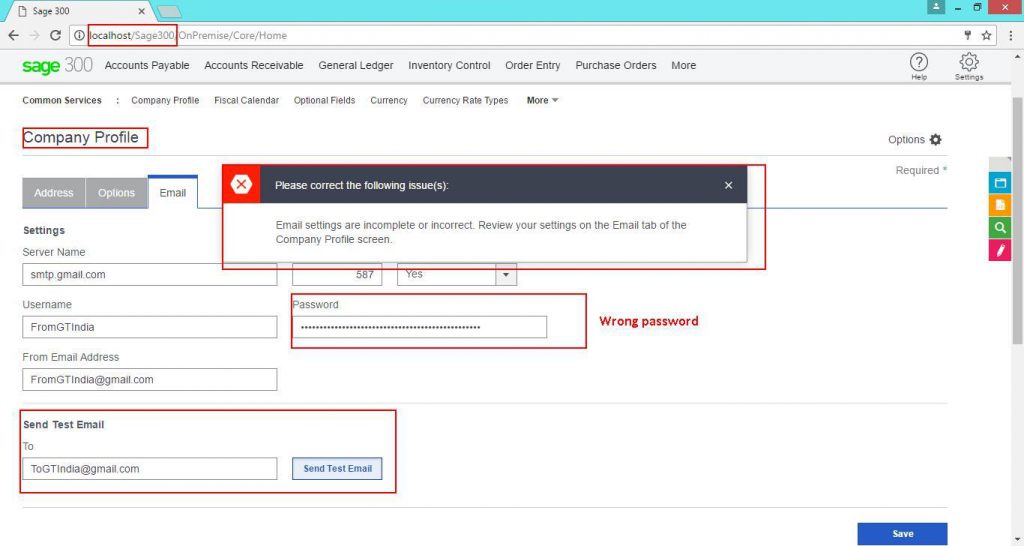
If the settings are not proper, test email will not be send to the email account specified in “To” and error message will appear on the screen. Please refer to screenshot below:
In the case of “Sage 300 2017 classic desktop” the functionality will work same as above.
Also read:
- Improve your Company’s Performance with Sage 300c
- Sage 300c Web Screens Installation
- Troubleshoot: Error while configuring the Sage 300 Web Screens
- Difference between Sage 300 Portal and the new Web Screens
- How to hide Sage 300 Web Screens using UI Profiles.
About Us
Greytrix is one stop solution provider for Sage ERP and Sage CRM needs. We provide complete end-to-end assistance for your technical consultations, product customizations, data migration, system integrations, third party add-on development and implementation expertise.
Greytrix have some unique solutions of Sage 300 integration with Sage CRM, Salesforce.com and Magento eCommerce along with Sage 300 Migration from Sage 50 US, Sage 50 CA, Sage PRO, QuickBooks, Sage Business Vision and Sage Business Works. We also offer best-in-class Sage 300 customization and development services to Sage business partners, end users, and Sage PSG worldwide.
For more details on Sage 300 Services, please contact us at accpac@greytrix.com. We will be glad to assist you.
