The Remit-To Locations are the addresses on which the payment cheques are send to the vendor. They are designed to maintain the names and addresses of the cheques recipients that are different from the vendor name and addresses. The form lets the user assign a primary remit-to location to be displayed on the Invoices from the vendor and printed on the cheques to be issued to the vendor. There can be multiple Remit-To Locations defined for a vendor.
New Stuff: Allow Edited After Invoices Printed

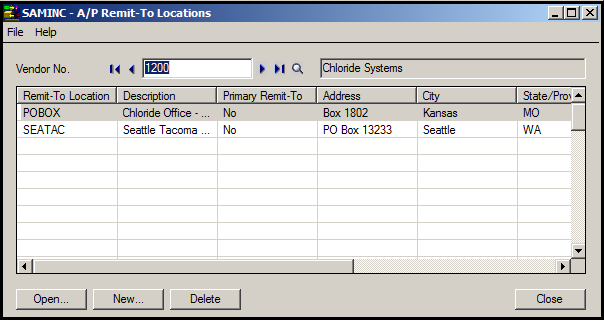
Sage 300 ERP provides a Remit-To Locations form to add, edit and delete remit-to locations and to view the details of the existing remit-to locations that have been setup for a vendor. To view the screen, navigate to Accounts Payable -> AP Vendors -> Remit-To Locations. The screen looks like:
If the Remit-To Location is set as the primary remit-to location then it will be used as the default one for each new Invoice.
Adding the Remit-To Location: On the Remit-To Location form select the vendor and click on the new button, type the code for the Remit-To Location fill in the required fields and click on Add
Edit Remit-To Locations: The details in the Remit-To Locations can be changed except for the location code. In the form, select the vendor code and the Remit-To location for which the details have to be changed and either double click or click on Open button make the changes and click on Save.
The Optional Fields tab of the Remit-To Location can be used to define the optional field for the particular remit-to locations. If the optional fields defined for the Invoices, vendors and the remit-to locations are same, when the remit-to location is specified in the Invoice entry, the system uses the optional field values from the remit-to location for the Invoice, Credit/ Debit notes.
The Remit-To Locations cannot be set as Inactive or deleted if it is used in any un-posted transaction. Once the Remit-To Location is set as Inactive, it cannot be used while adding an Invoice and we must also ensure that the Primary Remit-To checkbox should be un-ticked.
Also Read:
1. How to send Emails from OE invoice to customer via Sage 300 ERP
2. AR Invoice Report
3. Scoping Sage Intelligence Reports in Sage 300 ERP
4. USE DISTRIBUTION CODES TO SPEED UP DATA ENTRY in Sage 300 ERP
5. Restrict Posting to G/L Batches in Sage 300 ERP