Quantcast
Channel: Sage 300 ERP – Tips, Tricks and Components
Viewing all 1489 articles
Browse latest View live

IC Reorder Quantity in Sage 300

$
0
0

The reorder quantity is the level of inventory which triggers an action to replenish that particular inventory stock. It is a minimum quantity of inventory of an item which a company holds in stock, such that, when stock falls to this quantity, the item must be reordered.

We can set up reorder information (maximum, minimum, reorder, and projected sales quantities in item stocking units) for inventory items if we want to use the Overstocked Items report or the Reorder Report to assist you in managing your inventory.

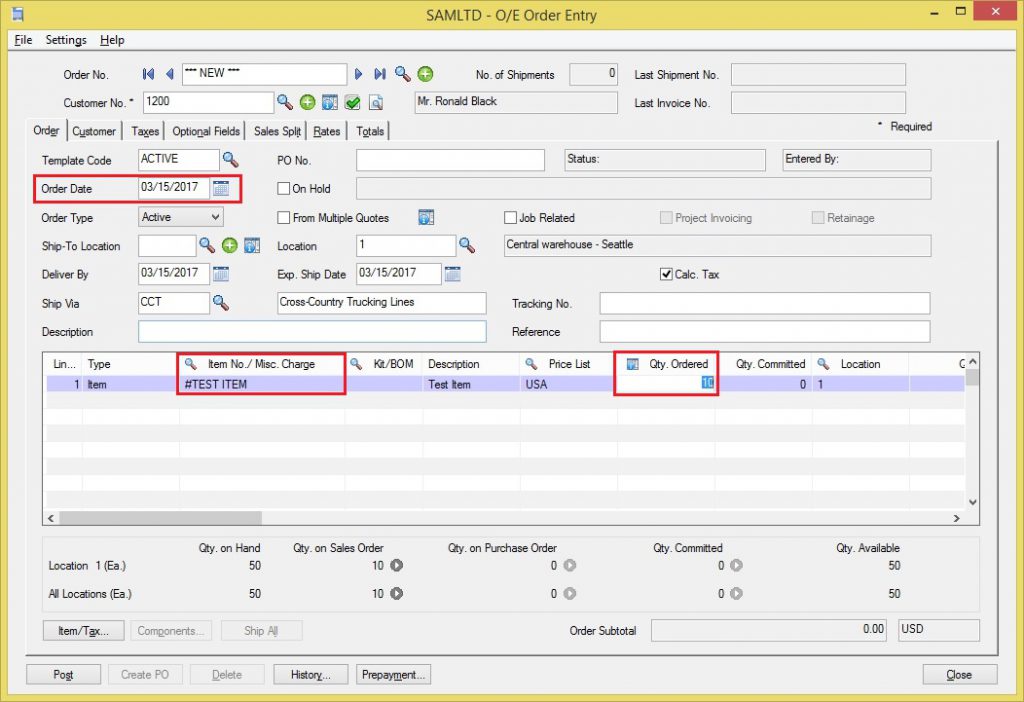
New Stuff : Create GL Batch Entry from AR Invoice Entry

Please find below screenshot for I/C Reorder Quantity Screen.IC_Reorder screen

In this example, reorder quantity is setup for all location. We want to have a minimum of 400 on hand. We don’t want to have more than 1600, we can re-order in the multiples of 250, and our projected sales quantity is 1500.

This screen below defines which vendors can supply a particular product. As Accpac itself will not know that to who purchase order to be raised.

IC_Vendor details

As you can see, Vendor 1 can supply item A1-105/0. Moving on to the Create POs from I/C screen now.

PO Create POs from IC

There are usual selection options, to choose a range of items, locations, and things like that. I want to highlight the important ones here:

  1. Run Date: This corresponds to reordering periods. Remember seasonality? If I choose a run date between January and October, Accpac will replenish inventory up to 300 units according to my setup. Any date in November or December will replenish up to 400.
  2. Reorder Quantities for: – Reorder quantities can be setup either for individual locations or for all locations. This is decided on per item basis. While generating purchase orders, you have to choose which type of reordering you are going to use.
  3. Reorder Quantity box with four options: – Use this when you are reordering in multiples of some quantity.
  4. Finally, if an item hasmultiple vendors, you can choose which vendor to use.

So, how does Accpac know what quantity to order? The key is in the I/C Location Details screen.

IC Location details

For a given location, Sage 300 takes the Quantity on Hand, plus Quantity on P/O, minus Quantity on S/O. This is the quantity that is theoretically available. This quantity is compared with the maximum quantity defined in I/C Reorder Quantities screen. The difference is ordered.

Also Read:-

  1. How to create PO from I/C
  2. Purchase Order Reports in Sage 300 ERP
  3. Difference between Standard cost and Average Cost in Sage 300
  4. How to handle Purchase Return in Sage 300 ERP
  5. Inventory Control Reports in Sage 300 ERP

Difference between Sage 300 Macro and OCX

$
0
0

Mainly the Sage 300 customization are done using OCX, VBA Macros and the executable. In this blog we are going to discuss what the differences in these two approaches are.

New Stuff: IC Reorder Quantity in Sage 300

Below listed are the differences between customization approaches using OEX and MACROS:

1. As the customization using OCX is basically a source code modification rather macro is enhancement to the original functionality without changing its basic source code.

2. Macros cannot able to alter the Sage 300 core business logic as well database structure.

3. The macros are also called as “upgrade safe” as it does not deal with database specification changes where in case of OCX it may require the long process including installations etc. So the Sage 300 version upgrades or product updates rarely need changes in the macros where as OCX need to be rebuild in that particular version.

4. Macro generally minimizes the development time rather than to use the traditional approaches for the customization of source code as the macro can access the Sage 300 session and error handling etc. This helps in minimizing time efforts for the changes.

5. Macros can be easily added to the Sage 300 desktop without any changes to roto.dat and grp.dat files where as in case of the customization using OCX requires modification to “roto.dat” and “grp.dat” file.

Note:  

1. Though it takes less efforts and time using macro for the source code customization still it depends on the technical efficiency and the complexity of the functionality.

2. However, OCX provides more flexibility in using Sage 300 controls such as accpacgrid etc. i.e. macros facilitates limited control on the Sage 300 objects.

Also read:

  1. Edit a Macro without installing Sage 300 SDK
  2. How To Record A Macro In Sage 300 ERP
  3. How To Add A Macro To Accpac Desktop of Sage 300 ERP
  4. Run VBA Macro without Logging to Sage 300 ERP
  5. Macros in Sage 300 ERP

Dealing with Macros while Sage 300 version upgrades

$
0
0

Macro can be used as powerful technique for various Sage 300 customization. It can be use to create your own screens that interact with particular business logic and perform the required custom tasks.

In this blog we are going to discuss about how the macros can be dealt with in case of Sage 300 upgrades.

New Stuff: Difference between Sage 300 Macro and OCX

Many customers does the customizations to have it business process get more faster and easier in terms of data entry or to have better reporting. Sage 300 releases more flexible, user friendly and enhanced versions almost every year. Customer will always prefer to be up to date and have advantage of all the enhanced features facilitated with the new release. But in this case, customizations may need rebuilding so that to make them compatible with the latest version resulting in the extra cost and the shucked data- entries due to incompatibility caused due to version upgrades.

The main advantage of using Sage 300 macros is macros are less sensitive to Sage 300 version upgrades. For this reason macros are also known as “Upgrade Safe”.

Note:  

1. Unless Sage 300 version upgrade includes any database structural changes and the macro is dealing with that particular database objects macro will not get affected due to Sage 300 version upgrade.

2. In case of dependencies, generally macro get itself crashed but does not affect/ crashes or corrupts any Sage 300 objects.

3.Also macros can be easily modified to male it compatible with the latest version of Sage 300 latest version.


Also read:

  1. Edit a Macro without installing Sage 300 SDK
  2. How To Record A Macro In Sage 300 ERP
  3. Define Budget Using Macro
  4. Run VBA Macro without Logging to Sage 300 ERP
  5. Macros in Sage 300 ERP

Sage 300 Customization to Print AP Aged Payable Report for multiple companies

$
0
0

Sage 300 “Accounts Payable” module provides the A/P Aged Payable Report.  This report internally provides various filtration criteria to generate report on the basis of Due Date, Document Date and overdue period etc.

We have further customized “Aged Payable” report for one of our client. In this blog we are going to discuss about this “Customized Aged Payable” report.

New Stuff: Dealing with Macros while Sage 300 version upgrades

On installing the customization separate icon will be added to Sage 300 à Accounts Payable –>A/P Transaction Reports desktop for “Customized Payables” report. Using this customized report user will be able to print the AP Aged Payables statements for all Sage 300 companies in the system at a time.

To achieve this we have provided configuration file in which user can maintain the user name and password in the encrypted format for all the Sage 300 companies which customer is using and willing to print the statements for the same. We are using the configuration file so that it will prevent the later source modification required in case of new Sage 300 Company to be included in the customization.

The user can login to one of the Sage 300 Company and set all the required filter criteria on the report user interface. According the selected criteria the customized report will login to all the sage 300 companies using the login credentials provided in the configuration file and will generate separate PDF file for the report. These files will be generated at the path specified in the configuration file.  Also the .pdf files will be saved with the name as per discussed format as mentioned below:

<ReportName>_<CompanyID>_<MMDDYYYYHHMMSS>.pdf i.e. e.g. “apapay11_SAMLTD_07272016123423.pdf”.

Note:  There is no changes on the report user interface all the parameters for the report as per standard screen.

Also read:

  1. Migrate AP Credit Note from QuickBooks to Sage 300 ERP
  2. Migrate AP Invoice from QuickBooks to Sage 300 ERP
  3. New way of post AP, AR, GL, Bank batches in Sage 300 ERP 2016
  4. Migrate AP Finance Charges from Sage Business Vision to Sage 300 ERP
  5. Concept of AP Create Payment Batch

Sage 300 Customization to Print AR Aged Trial Balance Report for multiple companies

$
0
0

Sage 300 “Accounts Receivable” module provides the A/R Aged Trial Balance Report.  This report internally provides various filtration criteria to generate report on the basis of Due Date, Document Date and overdue period etc.

We have further customized “Aged Trial Balance” report for one of our client. In this blog we are going to discuss about this “Customized Aged Trial Balance” report.

New Stuff : Sage 300 Customization to Print AP Aged Payable Report for multiple companies

On installing the customization separate icon will be added to Sage 300 à Accounts Receivable –>A/R transaction Reports desktop for “Customized Aged Trail Balance” report. Using this customized report user will be able to print the AR Aged Trial balance statements for all Sage 300 companies in the system at a time.

To achieve this we have provided configuration file in which user can maintain the user name and password in the encrypted format for all the Sage 300 companies which customer is using and willing to print the statements for the same. We are using the configuration file so that it will prevent the later source modification required in case of new Sage 300 Company to be included in the customization.

The user can login to one of the Sage 300 Company and set all the required filter criteria on the report user interface. According the selected criteria the customized report will login to all the sage 300 companies using the login credentials provided in the configuration file and will generate separate PDF file for the report. These files will be generated at the path specified in the configuration file.  Also the .pdf files will be saved with the name as per discussed format as mentioned below:

<ReportName>_<Company ID>_<MMDDYYYYHHMMSS>.pdf i.e. e.g. “ARTBAL01_SAMLTD_07272016123423.pdf”.

Note : There is no changes on the report user interface all the parameters for the report as per standard screen.

Also read:

  1. Create GL Batch Entry from AR Invoice Entry
  2. Difference between Standard cost and Average Cost in Sage 300
  3. Sage 300 PJC – Option to default AR Invoice Comment Field
  4. Migrate AR Write-Off from Sage Business Vision to Sage 300 ERP
  5. Knowing Pending Transaction In AR Customer Inquiry

AR Aged Statement Customized Report

$
0
0

Recently we had a chance to work on the AR Aged Trial Balance Report for one of our client. This report resides in Sage 300 under Account Receivable Module => A/R Transaction Reports => Aged Trial Balance.

Aged Trial Balance report list accounts receivable with outstanding balance by age buckets (30\60\90 days etc.). This report provide different options like printing report in detailed form, listing all outstanding documents for each customer, or summary form, printing one line for each customer number, including the current balance and the balance in each aging period. This report shows customer outstanding transaction for current period up to four aging periods. It also allows user to print report by using document date or posting date.

New Stuff: Sage 300 Customization to Print AR Aged Trial Balance Report for multiple companies

We have created a customized AR Aged Statement report for multiple SAGE 300 companies having same customer in all the companies. We have filtered the report on the basis of customer number and Statement date which is equivalent to Document Date on AR Aged Trial Balance Report.

We have considered the all below transaction types while printing the report.

  • Invoice
  • Debit Note
  • Credit Note
  • Unapplied Cash
  • Receipt
  • Adjustment
  • Interest
  • Prepayment
  • Refund

If Invoice/Debit note/Unapplied Cash/Refund is printing the amount will be printed in Debit column (Dr) and If Credit/Payment/Prepayment/Payment/IT – Interest Payable/Applied Receipt/ Adjustment/Earned Discount is printing the amount will be printed in Credit column (Cr). To calculate and display the ageing buckets we have executed the standard Ageing View passing the parameters as shown in below Snapshot.

AR Aged exe

In the Snapshot above we have selected statement date as 18 th February, 2025 so the closing balance from 18 th December, 2024 to 18 th January, 2025 will be the opening balance for all the customers and from 19 th January, 2025 to 18 th February, 2025 all transactions will be printed for all customers which is shown in the below snapshot.

Aging report

So using our customized Aged Report you can generate the Ageing for all the Sage 300 companies at once.

Also Read:-

  1. Add Comments in AR Aged Trial Balance Report
  2. Mailing A/R Aged Trial Balance IN SAGE 300 ERP
  3. Account Set wise Filter in AR Aged Trial Balance
  4. Trial Balance Report in Sage 300 ERP
  5. Sage 300 Customization to Print AR Aged Trial Balance Report for multiple companies

Sage 300 Desktop Lock

$
0
0

Custom report locks the sage desktop when the report is in open mode and sage desktop will remain locked until we close the custom report. Please find the below example.

New Stuff: AR Aged Statement Customized Report

1. Open Sage 300 and select a folder (either existing or new custom folder), right click and select “new report”.

New report addition 2. Enter a name for the report and then browse the path of the report. Click “OK.”

Report title addition screen

Select .rpt file from system3. Double click the newly created icon to open the report.

Custom crustal report

4. Now as the report is in open mode try to click on the sage desktop Icon, you will not able to open the sage as it get locked due to the custom crystal report.

5. To overcome with this issue we need to call the custom report from one simple macro as shown below

Print report screen6. When the report is open mode try opening the sage desktop now, you can open the sage desktop as custom report will not lock the sage desktop because the custom report has been called from the Macro.

Also Read:-

  1. Export Crystal Report in Multiple Formats
  2. Date wise IC stock Transaction Report
  3. How to run a Sage Intelligence report
  4.  How to modify standard Reports in Sage Intelligence
  5. User Authorization Report in Sage 300 ERP

How Are Sage 300 Macros Used

$
0
0

Macro is a scripting utility and framework that is delivered as a built-in feature of Sage 300.  Using Macros, you can customize the system, modify screens, schedule reports to run automatically, connect Sage 300 with external applications, and so many other workflow modifications.

New Stuff: Sage 300 Desktop Lock

Here are some common examples of Macros we have created for our Sage 300 customers:

1. Export Salesperson Info from Account Receivable to Excel.

To export the Salesperson Information user need to open Export Salesperson Info macro. The below is the screen shot of Export Salesperson Info.

Sales person import macro

After Exporting the Salesperson Info you will get this in Excel format.

Exported file

2. Import Excel format of Invoice Entry in to AR Invoice Entry Screen.

To Import the Excel Format of Invoice entry in to AR Invoice Entry screen. The below is the screen shot for Import Invoice Info.

Import-sheet-format

After importing you will get this entry in AR Invoice Entry Screen.

AR-Invoice Entry screen

So, you can use Macros to Import the entries through Excel and Export to Excel.

Also read:

  1. macros-in-sage-300-erp
  2. how-to-add-a-macro-to-accpac-desktop-of-sage-300-erp
  3. Dealing with Macros while Sage 300 version upgrades
  4. Difference between Sage 300 Macro and OCX
  5. Password Protect Macro Code in Sage 300 ERP

How to Filter Finder Data in Sage 300 ERP

$
0
0

The Finder tool in Sage 300 ERP is used for the selection of the Key value for which the finder is specified. Finder tool can be launched by clicking the magnifier icon on the Sage 300 screen and also can be opened by selecting the control and pressing hotkey “F5”.

New Stuff: How Are Sage 300 Macros Used

Filter option is divided into various parts:
User can filter the data based on the field selected in the “Find By” list.

Item Finder

Below “Find By” list there is an option to select “Starts with” or “Contains” which is used for the fields other than fixed value fields (“Yes/No”,”Active/Inactive”,”Active/Quote/Standing/Future”)

Find BY Dropdown liat

Item Number in the above screen is not the fixed value field. So user has an option to select the searching pattern with specifying the initial value or specifying the value that is present withing the field (Before/After/Between).

Finder

Stock Item in the above screen is fixed value field. So user have fixed options to select the searching pattern as in above case “Yes/No”.

The searching text is entered in the “Filter” option.

Filter by Item Number

The Sage 300 filter in the finder also provides 2 options to filter the data

1. Auto Search check-box

The filter is processed as the user enters the value in the control for the filter.

Filter by item number2. Find New button

User enters the searching text in the filter control and clicks on the “Find Now” button to filter the records.

Finder

So, filtering the records for the selection of the key values helps to faster the process of transactions in Sage 300 ERP.

Also Read

  1. How to filter finder based on optional fields
  2. Adding Search Fields in Finder of Sage 300 ERP
  3. Customer Wise Item filter on Order Entry screen in Sage 300 ERP
  4. Transaction filtering and sorting feature under Reconcile Statements Form
  5. Account Set wise Filter in AR Aged Trial Balance

Sorting Finder Data in Sage 300 ERP

$
0
0

The Finder tool in Sage 300 ERP is used for the selection of the Key value for which the finder is specified. Finder tool can be launched by clicking the magnifier icon on the Sage 300 screen and also can be opened by selecting the control and pressing hotkey “F5”.

New Stuff : How to Filter Finder Data in Sage 300 ERP

The finder control provides an option to sort the data displayed in the grid in the list of specified fields by Sage 300 ERP. The navigation for the sorting the records in grid is Key → Select the required field for sorting from the top section of the menu.

Finder Item setting

In the above screen we have selected the “Item Description” for sorting the records. The records are sorted in the order of (0-9) → (A-Za-z) as displayed in the below results.

Finder Item

So, sorting the records allows the proper view of records to the user.

Also Read:

  1. Sort Items by Picking Sequence In Order Entry Screen
  2. Customer Wise Item filter on Order Entry screen in Sage 300 ERP
  3. Difference between Sage 300 Macro and OCX
  4. How to filter finder based on optional fields
  5. Transaction filtering and sorting feature under Reconcile Statements Form

Migrate Item Location form Sage Pro to Sage 300 ERP

$
0
0

GUMU™ for Sage PRO ERP to Sage 300 ERP is a Sage certified Migration solution. Greytrix is a pioneer in providing Migration services at its Sage Migration Centre and catering end-users business requirements.

We at Greytrix help the end – user in implementing new Sage 300 ERP system through our various successful migration and integration solutions.

In this blog we will discuss about how GUMU TM migrates Item Location Sage PRO ERP to Sage 300 ERP (Formerly known as Accpac).

New Stuff: Migrate Items from Sage PRO ERP to Sage 300 ERP

You can see the payment terms assigned to vendor by following the below mentioned path:

Open Sage Pro data –>  IC –> Maintain –> Inventory Items –> Item Masters (Select Item Location from dropdown) refer below screenshot.

Sage Pro Item Location

In the below screenshot you can see that the location ‘WH1’ is assigned to item no. ‘CAD5’.

Sage Pro Item Location maintenance

In the below screen shot you can see the converted item location ‘WH1’ and it’s assigned to Item no. ‘CAD5’ in Sage 300 ERP.

Sage 300 Item Location

In the above mentioned ways the item location gets converted into Sage 300 ERP.

About Us:
Greytrix is one stop solution provider for Sage ERP and Sage CRM needs. We provide complete end-to-end assistance for your technical consultations, product customizations, data migration, system integrations, third party add-on development and implementation expertise.

Greytrix helps in migrating to Sage 100, Sage 300 and Sage ERP X3 from Sage Pro, Sage 50 US, Sage 50 CA, Sage 50 Usage Business Works, Sage Business Vision, QuickBooks and MS Dynamics Great Plains.

Also Read:
1. What do you want to migrate to Sage ERP
2. Data migration from your accounting system to Sage ERP
3. Migrate customers from Sage 50 (Canada) to Sage 300
4. Migrate banks from Sage 50 (Canada) to Sage 300 ERP
5. Migration of Purchase Payment from Quickbooks to Sage 300

Migrate sales payment from Sage 50 US to Sage 100

$
0
0

GUMU™ for Sage 50 ERP to Sage 100 ERP is a Sage certified Migration solution. Greytrix is a pioneer in providing Migration services at its Sage Migration Center and catering end-user business requirements. We at Greytrix are focused to help the end –user in successfully implementing the new Sage 100 ERP system through our various successful migration and integration solutions.

We provide data Migration Services from Sage 50 US ERP (formerly known as Peachtree) to Sage 100 ERP (formerly known as MAS90) at our Sage Migration Center. Our GUMU™ migration utility is compatible to convert all Master and Open transactions and GL historical data from Sage 50 ERP to Sage 100 ERP.

New Stuff :  Migrating AP Invoices from Sage 50 US to Sage 100

Now, we will discuss about migrating sales payment from Sage 50 US edition to Sage 100 ERP in our ERP Migration services.

Let’s have a quick look on the Sage 50 ERP Receive money screen.

In the below screenshots you can see the AR payment that are migrated from Sage 50 US to Sage 100 ERP. In Sage 100 ERP division fields are optional if we check that field then entries will include division. In below screenshot ’00’ is division number. Let’s have quick look on Cash Receipt Entry Screen of Sage 100 ERP.
In the below screenshot you can see the header tab of Cash Receipt Entry.

In the below screenshot you can see the Line tab of cash Receipt.

Below is the mapping sheet of the converted payment fields from Sage 50 US to Sage 100About us:

Greytrix helps in migrating to Sage 100, Sage 300 and Sage ERP X3 from Sage ProSage 50 USSage 50 CA, Sage 50 UK, Sage Business Works, Sage Business Vision, QuickBooks and MS Dynamics Great Plains.

Also Read:
1. Migrate Item Location from Sage 50 US to Sage 100 ERP
2.Migrate Vendor Memos from Sage 50 CAD (Simply Accounting) to Sage 300 ERP
3.Migrate Currencies from Sage 50 CAD (Simply Accounting) to Sage 300 ERP
4.Migrate Users from Salesforce to Sage CRM
5.Migrate Item Vendor from QuickBooks to Sage 300 ERP


Sage 300c Web Screens Installation

$
0
0

Sage 300c is a smart choice for small and medium businesses to unlock their untapped potentials, reduce costs and improve their performance.

Sage 300c is a web-based business management solution suite that provides SMEs with a highly adaptable solution for finance and operations. Sage 300c allows user to access the data through web browser. In this blog we will see how to install the sage 300c web UIs.

Prerequisites

  1. Before making the installation of Sage 300c please make sure your system meets all the software and hardware requirements listed in Compatibility Guide.

  2. You should install Microsoft Internet Information Services (IIS) server role from the Server Manager.

  3. Create a Portal database in the SQL server management studio if you do not have already. As the database is used by sage 300c web screens.

Installation

The “Web screens” option is available in our installer features list while installing setup. You must check that option to install the web screens. Please refer below screen shot.

Sage 300c Web Screens Installation

Once you complete the setup then configure the portal database. Web screens uses few tables from the portal database and they are automatically created when database setup is created so if you delete and recreate the portal database then you should rerun the database setup.

Now activate administrative services, common services and general ledger from the administrator. After that ensure the security authorization’s to access the modules and use it.

Now you are ready to sign in and start using Sage 300c Web screens. Sage 300c, Sage 300, Web screens, installation.


About Us:

Greytrix is one stop solution provider for Sage ERP and Sage CRM needs. We provide complete end-to-end assistance for your technical consultations, product customizations, data migration, system integrations, third party add-on development and implementation expertise.

Greytrix have some unique solutions of Sage 300’s integration with Sage CRMSalesforce.com and Magento eCommerce. It also offers best-in-class Sage 300 customization and development services to Sage business partners, end users, and Sage PSG worldwide.

For more details on the component, please contact us at accpac@greytrix.com . We will be glad to assist you.

Troubleshoot: Error while configuring the Sage 300 Web Screens

$
0
0

With the new version of Sage 300, everyone is excited to use new version of Sage 300 ERP i.e. Sage 300c. In this blog we will guide how to troubleshoot the error occurred during the configuration of the Web UIs.

After installation of the Web Screens, it is necessary to configure PORTAL in the database setup screen. But when user tries to configure the PORTAL in the database setup they might come across the error “Error. Failed to create landlord database tables”

Please refer the below screen shot.

Sage 300 Web Screens configuring error

There are following things which needs to check to overcome this error:

1. Verify “PORTAL” Database ID on SQL server:

Before verifying anything else, please make sure you have created the PORTAL database which later need to specify in the database setup during the configuration of the Web UIs.

portal tab portal database id

 2. Check whether the SQL services are running on the server:

Even if you have created the “PORTAL” database on SQL server, still if you are facing the same error. Ensure the SQL services are in running status.

To do this, you will need to get access to your database server either by logging into to console or initiating a Remote Desktop Protocol (RDP) session to the server. To check the services, enter ‘services.msc’ in RUN command and click on enter to open the Services Management as shown below.

Error while configuring the Sage 300 Web Screens

The highlighted service should indicate that their status is ‘Running’ and Startup Type is set to ‘Automatic’.

If the SQL Server service is not shown as ‘Running’ you have more than likely found the root of your problem. You can start/re-start this service by right clicking on the SQL Server service and choosing ‘Start’ or ‘Restart’ as highlighted below.

3. Verify whether the Port number for SQL server database engine is defined:

To assign a TCP/IP port number to the SQL Server Database Engine

1) In SQL Server Configuration Manager, in the console pane, expand SQL Server Network Configuration, expand Protocols for <instance name>, and then double-click TCP/IP.

sql server confiduration manager

2) In the TCP/IP Properties dialog box, on the IP Addresses tab, several IP addresses appear in the format IP1, IP2, up to IPAll.

TCP IP Properties

3) In the IPn Properties area box, in the TCP Port box, type the port number you want this IP address to listen on, and then click OK.

4) Restart the SQL Server and SQL browser services to take the effect.

Once you are done with the above steps try to reconfigure the Web UIs and it should connect without any problem.


About Us:

Greytrix is one stop solution provider for Sage ERP and Sage CRM needs. We provide complete end-to-end assistance for your technical consultations, product customizations, data migration, system integrations, third party add-on development and implementation expertise.

Greytrix have some unique solutions of Sage 300’s integration with Sage CRMSalesforce.com and Magento eCommerce. It also offers best-in-class Sage 300 customization and development services to Sage business partners, end users, and Sage PSG worldwide.

For more details on the component, please contact us at accpac@greytrix.com. We will be glad to assist you.

Use of Costing Method in Purchase Order

$
0
0

The purchase order module can be configured to default to one these four values, plus an option to use the vendor cost defined in IC Vendor Details. Timing is important to understand when creating a purchase order. The value entered on the PO is set when the line item is created on the PO. Any subsequent cost updates made after the PO is initially created will not be reflected on the PO. Of course, when the PO is received and invoiced, the actual costs will be reflected and the various costs will be updated accordingly for future transactions.

New Stuff: Sage 300c Web Screens Installation

Choosing a default costing method does not determine the accounting value for your inventory but it can be an aid to ensure the PO cost will default to the most accurate cost based upon your business and industry.

PO Option setting

Also Read:

  1.  Detail Purchase Order Report in Sage 300
  2. Difference between Standard cost and Average Cost in Sage 300
  3. Update Unit Cost with Base Price while creating Purchase Orders from Order Entry
  4. Creating Purchase Order by Using Sales Order details in Sage 300.
  5. Template Provision in Sage 300 ERP (Purchase Orders Module)

About Us

Greytrix is one stop solution provider for Sage ERP and Sage CRM needs. We provide complete end-to-end assistance for your technical consultations, product customizations, data migration, system integrations, third party add-on development and implementation expertise.
Greytrix have some unique solutions of Sage 300’s integration with Sage CRMSalesforce.com and Magento eCommerce. It also offers best-in-class Sage 300 customization and development services to Sage business partners, end users, and Sage PSG worldwide.
For more details on the component, please contact us at accpac@greytrix.com . We will be glad to assist you.


Export Sales by Salesperson

$
0
0

By using our “Export Salesperson Info utility” you can know how much sales done by salesperson on every Fiscal Year/Period. The sales information will get exported in excel format with respective details.

New Stuff: Use of Costing Method in Purchase Order

Follow below steps to exported sales by salesperson.The below is the screen shot of Export sales by salesperson.

Export Sales person import macro

This macro is present with following fields.

1. Export File Path:- This field shows the selected excel file path. “…” button is used select excel file.

2. Salesperson :- This field is used to select range of salespersons to include in the export.Put a blank in the From field and the ZZZZZZs in the To field to include all salesperson If you want to include only one salesperson, enter the same salesperson code in both fields.

3. Show :- This field is used to export sales information in details or summary.

4. Year :- This field is used to select fiscal year to include in the export.5. Period: – This field is used to select period of fiscal year to include in the export.

Sales person import macro

System file explorer veiw

After selection of fields and file path click on export button to export the sales by salesperson details. Utility will pop up success message after process gets completed successfully.

Success message

After completion of process all sales by salesperson details will get exported in selected excel file.

When if you select “Show” filed as Details, it will export one salesperson sales details in single worksheet of excel. The below is screen shot of details excel.

Sales person macro

Exported file

When if you select “Show” filed as Summary, it will export all salesperson sales details in single worksheet of excel. The below is screen shot of details excel.

Export sales person with summary option

Exported file

You can follow below link to add macro to desktop of sage 300.
How To Add A Macro To Accpac Desktop of Sage 300 ERP

Also read:

  1. O/E Salesperson Inquiry
  2. Setting up Salesperson Commission in Sage 300 ERP
  3. Salesperson Alert
  4. Migrate Sales Person from QuickBooks to Sage 300 ERP
  5. Migrate Sales Person from Sage BusinessWorks to Sage 300 ERP

About Us

Greytrix is one stop solution provider for Sage ERP and Sage CRM needs. We provide complete end-to-end assistance for your technical consultations, product customizations, data migration, system integrations, third party add-on development and implementation expertise.
Greytrix have some unique solutions of Sage 300’s integration with Sage CRMSalesforce.com and Magento eCommerce. It also offers best-in-class Sage 300 customization and development services to Sage business partners, end users, and Sage PSG worldwide.
For more details on the component, please contact us at accpac@greytrix.com . We will be glad to assist you.

New Features in Bank Services in Sage 300

$
0
0

With the release of the Sage 30 v2016 some new features has been introduced. In this blog we are going to discuss new features added in Bank Services module.

In Bank Services there is a Post Reconciliations button on the Reconciliation screen, So that users don’t have to exit the screen to post the bank reconciliation down. In order to check the button Go to Common Services -> Expand the option Bank Services ->Select Bank Transactions -> Click on Post Reconciliation.

New Stuff: Export Sales by Salesperson

Bank services

There were also improvements made to how fast the reverse transactions finder screens open and the quick clearing screens within back reconciliation.

Below is the Screen used for Reverse Transactions

Reverse transaction

This additional feature helps the user for easy and fast entry.

Also Read:

  1. Reverse Transactions for Bank Services in Sage 300
  2. Sage 300 – Common Services – Option to Allow Non-Existent G/L Account.
  3. Migrate Banks from Sage 100 ERP to Sage 300 ERP
  4. Experience real measurable business results without breaking the bank with GUMU™ Integration for Salesforce with Sage 300
  5. Bank Reconciliation Status Report

About Us

Greytrix is one stop solution provider for Sage ERP and Sage CRM needs. We provide complete end-to-end assistance for your technical consultations, product customizations, data migration, system integrations, third party add-on development and implementation expertise.
Greytrix have some unique solutions of Sage 300’s integration with Sage CRMSalesforce.com and Magento eCommerce. It also offers best-in-class Sage 300 customization and development services to Sage business partners, end users, and Sage PSG worldwide.
For more details on the component, please contact us at accpac@greytrix.com . We will be glad to assist you.

Sales Invoice Report

$
0
0

A sales invoice is a bill that lists the details of a purchase of goods or services. This commercial document is issued by a seller to a buyer, and it usually details the payment terms of the transaction. Sales Invoice can be created once the shipment is completed. In some situation we want to know the sales invoice details for each customer. By using our Sales Invoice Report we can easily print an invoice details.

New Stuff: New Features in Bank Services in Sage 300

To run this report we have provided a new macro. The below is the screen shot of macro.

Invoice sales report

Customer number field is used to select customer code.
From Invoice Date and To Invoice Date fields are used to select date and the report will print invoices between selected dates of selected customer.
We create one invoice by using invoice entry screen. The below is the screen shot of Invoice Entry.

OE Invoice entry

Invoice number is IN0000000000072 with one item A1-103/0. This invoice is created for customer 1100.

After selection of customer code and dates, click the print button to view the invoice details.

Print button click event

Exported Report

Here you can check details of invoice get printed in report.

Also read:

  1. Export Sales by Salesperson
  2. Print Instructions in Sales Invoice Report
  3. Sales Invoice Reversals in Sage 300 ERP
  4. Account Receivable – Invoice Sales Split Tab in Sage 300
  5. Migrate Salesperson Code from Sage 100 ERP to Sage 300 ERP

About Us

Greytrix is one stop solution provider for Sage ERP and Sage CRM needs. We provide complete end-to-end assistance for your technical consultations, product customizations, data migration, system integrations, third party add-on development and implementation expertise.
Greytrix have some unique solutions of Sage 300’s integration with Sage CRMSalesforce.com and Magento eCommerce. It also offers best-in-class Sage 300 customization and development services to Sage business partners, end users, and Sage PSG worldwide.
For more details on the component, please contact us at accpac@greytrix.com . We will be glad to assist you.

How to restrict Expired Serials in Sage 300 ERP

$
0
0

Inventory is the total amount of goods or materials stored in Store/Warehouse/stockyard. Factory managers or store keepers should be aware of the total stock available for sale and out of stock or expired items to properly handle customer/ vendor orders.

New Stuff : Sales Invoice Report

Here we will see how serial numbers expiry date can be maintained in Sage 300 ERP. Restricting use of an expired serial number can be achieved in Sage 300 ERP using Serial Inventory options. You can ensure that the expired serial numbers are not available for Shipping/Invoicing.

1. Navigate to Inventory Control -> I/C Setup -> Options –>Serials Numbers Tab. Kindly refer below screenshot for the same.

IC Option2. Select the “Expired Serial Allocation Message” as error/warning in the Serials tab in the above screen.

3. Next go to Inventory Control -> I/C Items and Price lists -> Serial Numbers

In this screen, select the Serial number for which the expiry date has to be mentioned. Specify the date in the Expiry date field as shown below:-

IC Serial number screen

In order to see real time working, let’s make an Order as shown below:-

1. Create an order and select the “Order Date” prior to the “Expiry Date” assigned to that Serial and then select the same Item Number which has been assigned the Expired Serial Date.

OE Order Entry2. Select the Serial that has the expired date assigned to it.

Serial Number Allocation Screen

3. After the selection of the serial, an error message will be displayed regarding its expiry and will not allow that serial to be assigned to the details of the Order. Refer screenshot below.

Error log

So, user has the provision to restrict Expired Serials in Sage 300 ERP.

Also Read:

  1. How to allocate a Serial and Lot number at Order Entry screen in Sage 300 ERP
  2. Serial/Lot Number Stock Report
  3. How to restrict Expired Lots in Sage 300 ERP
  4. Warranty Tracking in Sage 300 ERP
  5. Confirmation message in IC Transactions

About Us

Greytrix is one stop solution provider for Sage ERP and Sage CRM needs. We provide complete end-to-end assistance for your technical consultations, product customizations, data migration, system integrations, third party add-on development and implementation expertise.
Greytrix have some unique solutions of Sage 300’s integration with Sage CRMSalesforce.com and Magento eCommerce. It also offers best-in-class Sage 300 customization and development services to Sage business partners, end users, and Sage PSG worldwide.
For more details on the component, please contact us at accpac@greytrix.com . We will be glad to assist you.

Easily customize screens in Sage 300c

$
0
0

Sage 300c has a user-friendly interface, through which user can easily find the required screen from the main screen only instead of going to the specific module. This is one of the useful features for all of the end users.

In this version, we can easily hide or show the button or label & also can also change label text as per requirement. On each screen, we will get an option for customization as shown in below screen shot.

customize screens in Sage 300c

After click on the customize option below screen will get appear.

customize option sage 300

For change the label text.

label text in sage 300c

After changing the label text.

sage 300 changing the label text

In the above screenshot, you can see the label is get changed from Vendor Number to Vendor No. Like this, you can easily modify the screen level change very easily.

If you remember, in our windows version for changing or hiding the labels you have to customize the screens & regenerate the OCX DLL & that would be heavy things into our repository to maintain all the customized data. With the help of this feature, you can save your space into the hard drive.

About Us:

Greytrix is one stop solution provider for Sage ERP and Sage CRM needs. We provide complete end-to-end assistance for your technical consultations, product customizations, data migration, system integrations, third party add-on development and implementation expertise.

Greytrix have some unique solutions of Sage 300’s integration with Sage CRMSalesforce.com and Magento eCommerce. It also offers best-in-class Sage 300 customization and development services to Sage business partners, end users, and Sage PSG worldwide.

For more details on the component, please contact us at accpac@greytrix.com . We will be glad to assist you.

Viewing all 1489 articles
Browse latest View live


<script src="https://jsc.adskeeper.com/r/s/rssing.com.1596347.js" async> </script>