Quantcast
Channel: Sage 300 ERP – Tips, Tricks and Components
Viewing all 1488 articles
Browse latest View live

Solution to License Issue in Sage 300 ERP

$
0
0

While working with Sage 300 environment, many times we encountered an issue related to product license.

New Stuff : Difference between Sage 300 Portal and the new Web Screens

Going further, in this blog we will discuss about the solution of this issue in details.

Error log message

How to Resolve:

1. We have to check Sage 300 Shared Data directory path in the registry, (Go to Start, Run and type regedit).

Run command with regedit

32 bit environments:-
HKEY_LOCAL_MACHINE\SOFTWARE\ACCPAC International, Inc.\ACCPAC\Configuration

64 bit environments:-
HKEY_LOCAL_MACHINE\SOFTWARE\Wow6432Node\ACCPAC International, Inc.\ACCPAC\Configuration

Registry editor

2. Confirm the same location should be displayed in the registry if it is being accessed from a workstation(s) that can open a company successfully.

3. Check the user permissions for the Sage 300 Shared Data directory. Windows user accounts must have full access to the folders and sub-folders.

Note: The above steps have resolved a majority of these issues. In some cases there is a second registry key in the HKEY_CURRENT_USER\Software\ACCPAC INTERNATIONAL, INC. that is causing the error.

Also Read:

1.  Business Intelligence Security and License Managers in Sage 300.
2.  License information for this component not found
3.  LanPak License getting used to create a XAPI Session
4.   Use of contract code
5.   XAPI Session from Web Service in Sage 300 ERP

About Us

Greytrix is one stop solution provider for Sage ERP and Sage CRM needs. We provide complete end-to-end assistance for your technical consultations, product customizations, data migration, system integrations, third party add-on development and implementation expertise.
Greytrix have some unique solutions of Sage 300 integration with Sage CRM, Salesforce.com and Magento eCommerce along with Sage 300 Migration from Sage 50 US, Sage 50 CA, Sage PRO, QuickBooks, Sage Business Vision and Sage Business Works. We also offer best-in-class Sage 300 customization and development services to Sage business partners, end users, and Sage PSG worldwide.


New Feature with Sage 300 v2017 Patch 2 for Email Settings on Company Profile

$
0
0

Global warming and Go Green being need of hour. Without printing the documents on the paper, Sage 300 introduced new feature which supports SMTP email feature. As in today’s business the need of efficient communication and organized documentation electronic emailing feature has proven to be very helpful means for achieving the same.

In today’s blog we will be discussing about the helpful feature of Sage 300 ERP that has been included in Sage 300 v2017 PU2 for the classic desktop as well web screens.

New Stuff: Solution to License Issue in Sage 300 ERP

Navigating to the screen:

Sage 300 v2017 classic desktop:

In order to access the screen navigates to Common Services –> Company Profile screen–> Email Tab. Kindly refer to the screenshot below for the same.

Sage 300C web screens:

In order to access the screen navigates to More –> Common Services –> Company Profile –> Email Tab. Kindly refer to the screenshot below for the same.

As displayed in above screenshots an additional “Email” tab is provided on the Company Profile screen. User can set or predefines below set of values which can be used in various emailing process in Sage 300 e.g. “Report ‘.pdf’ files emailing” etc.

Server Name:

A text field is provided where user can enter the email sever name to be used. The format to specify the server name should be “smtp.Server Name” e.g. if you are using gmail server for emailing you can specify the server name as “smtp.gmail.com”.

Server Port:

Here user needs to specify the port to be used for sending email.The default value is 587, but you can change it.
It is recommended using Port 587 while using SMTP services with (send grip) to avoid potential rate limiting or blocking. Port 465 can also be used but SSL should be set to true.

Use SSL:

The default value for this is “Yes”. User can any time change it as per requirement.It is recommended to make changes in these settings with the help of “SMTP Server Documentation” or consult the IT professional as this settings affects data encryption and authentication.

User Name:  Enter the username for the SMTP server to be used when sending email as a from email account i.e. as sender.

Password: Enter the password for the email account to be used when sending email as a from email account i.e. as sender.

From Email Address: Enter the email address to be used when sending email as a from email account i.e. as sender.

Note: Depending on the SMTP server you use, this address may need to match the one you enter in the Username field, or may not work unless you set up an email alias. Consult your SMTP server documentation for details about sending email.

Use SMTP: User need to select this option i.e. need to set this check box checked if user is going to user SMTP services for email sending otherwise clear the selection if user is going to user other than SMTP services i.e. Microsoft outlook etc.

To: Here user need to specify the ‘To’ email id for the test email.

This tab allows user to set default SMTP email settings that will be used when user selects Email option while printing various documents (reports).

Note:

User can able to change these settings any time.

Active internet connection is needed while using these settings made for successful emailing process.User can be able to verify the settings made are proper or not by sending test email from this screen. Please find below screenshot for reference:

On successful email sending message will be displayed as below.

Test email will be received on the “To” email account as below:

If the settings are not proper, test email will not be send to the email account specified in “To” and error message will appear on the screen. Please refer to screenshot below:

In the case of “Sage 300 2017 classic desktop” the functionality will work same as above.

Also read:

  1. Improve your Company’s Performance with Sage 300c
  2. Sage 300c Web Screens Installation
  3. Troubleshoot: Error while configuring the Sage 300 Web Screens
  4. Difference between Sage 300 Portal and the new Web Screens
  5. How to hide Sage 300 Web Screens using UI Profiles.

About Us

Greytrix is one stop solution provider for Sage ERP and Sage CRM needs. We provide complete end-to-end assistance for your technical consultations, product customizations, data migration, system integrations, third party add-on development and implementation expertise.

Greytrix have some unique solutions of Sage 300 integration with Sage CRM, Salesforce.com and Magento eCommerce along with Sage 300 Migration from Sage 50 US, Sage 50 CA, Sage PRO, QuickBooks, Sage Business Vision and Sage Business Works. We also offer best-in-class Sage 300 customization and development services to Sage business partners, end users, and Sage PSG worldwide.

For more details on Sage 300 Services, please contact us at accpac@greytrix.com. We will be glad to assist you.

Confirm On Print Preferences in Sage 300

$
0
0

In this blog we are going to discuss one of the feature of Sage 300 i.e. to avoid the dialog box when we print the report.

If you print any report in Sage 300 with the Print Destination as “Printer” or “File” its pop up the below dialog box to select Printer, Page Size, Orientation for “Printer” or Format and destination for “File”.


New Stuff : New Feature with Sage 300 v2017 Patch 2 for Email Settings on Company Profile

If you have single printer to print the reports then you do not need to setup printer, paper size in every time we print, to avoid this dialog boxes Sage 300 provide one checkbox “Confirm on Print” at View Menu present at Sage 300 desktop.

In order to access the screen navigates to View Menu –> Preferences. Kindly refer the below screenshot

Click on the Preferences and it will open below form.

Uncheck the checkbox “Confirm on print” and click OK button.

Now if we print any report by using the Print Destination as a “Printer” or “File” it will not pop-up any dialog box.

Also Read:

  1. Set Print Destination in Sage 300 ERP
  2. Change Print Destination in Sage 300 ERP
  3. Macro recorded to printing Picking Slips prints blank report
  4. Report not printing when printer option is set to printer in sage 300 ERP
  5. Printing Non-invoiced and Partially invoiced Reports

About Us

Greytrix is one stop solution provider for Sage ERP and Sage CRM needs. We provide complete end-to-end assistance for your technical consultations, product customizations, data migration, system integrations, third party add-on development and implementation expertise.

Greytrix have some unique solutions of Sage 300 integration with Sage CRM, Salesforce.com and Magento eCommerce along with Sage 300 Migration from Sage 50 US, Sage 50 CA, Sage PRO, QuickBooks, Sage Business Vision and Sage Business Works. We also offer best-in-class Sage 300 customization and development services to Sage business partners, end users, and Sage PSG worldwide.

For more details on Sage 300 Services, please contact us at accpac@greytrix.com. We will be glad to assist you.

Error: “Control is not properly installed” while opening customized screen in Sage 300 ERP

$
0
0

We have many situations where we customize the Sage 300 ERP screens and get the error while opening the customized screen “Control is not properly installed”. Sometimes this error occurs only for certain systems and the screen works fine on other systems. The reason behind this error is that the Sage 300 is unable to locate the CLSID specified for the control in the registry and the roto.dat file of the selected module.

New Stuff: Confirm On Print Preferences in Sage 300

We will take the example of the O/E Order Entry screen which is customized and is throwing an error “Control is not properly installed” while opening the screen from Sage 300 ERP Desktop.

We can investigate to check whether the cause of the error is due to the mismatched CLSID following below steps:

  1. Open the registry (Run “regedit” command) and search for the control causing the error i.e. in our case “AccpacOE1100UICtrl”. Navigate to the CLSID of the control, the class id is available under Data column ({CAF35233-78CD-4852-BEDF-D01B323F953A}).

  2.  Execute the “rotoedit.exe” available only if the Sage 300 SDK is installed. This executable is present under path “\Pluswdev\BIN\”.

  3. Open the “roto.dat” file for the module i.e. OE module. Scroll to locate the control ID “OE1100” and click on Edit. The last part under the Module contains the CLSID present in the registry ({caf35233-78cd-4852-bedf-d01b323f953b}).

  4. Compare the same with the CLSID of the registry and make sure that roto.dat contains the same ID as that in the registry and save the changes.


5. Reopen Sage 300 Company and the O/E Order Entry screen where you will be now able to open the screen and the error no more exists.

Alternatively, you can also check with the other solution as the cause of the issue may differ from system to system. Follow “Control is not properly installed” error in Sage 300 ERP.

So, this can be helpful when the developer cannot track the cause and all the permissions are granted correctly but the registry for some systems changed.

Also Read:

  1. Error code: 713, Class not registered” on opening customized screen in Sage 300 ERP
  2. Error Occurred while Opening View
  3. Error: Sage 300 ERP UI Container has stopped working message occurs when printing reports
  4. Troubleshoot: Error while configuring the Sage 300 Web Screens
  5. Database Error 49153 in Sage 300 ERP

About Us

Greytrix is one stop solution provider for Sage ERP and Sage CRM needs. We provide complete end-to-end assistance for your technical consultations, product customizations, data migration, system integrations, third party add-on development and implementation expertise.

Greytrix have some unique solutions of Sage 300 integration with Sage CRM, Salesforce.com and Magento eCommerce along with Sage 300 Migration from Sage 50 US, Sage 50 CA, Sage PRO, QuickBooks, Sage Business Vision and Sage Business Works. We also offer best-in-class Sage 300 customization and development services to Sage business partners, end users, and Sage PSG worldwide.

For more details on Sage 300 Services, please contact us at accpac@greytrix.com. We will be glad to assist you.

Significance of using Contract Structures screen in sage 300 PJC

$
0
0

With the help of Sage 300 Project and Job Costing module organization can be able to manage estimations, tracking inventory purchase, costing, and billings of projects, miscellaneous costs as well as processing charges. This module also facilitates user to set some formats for the various documents/transactions that are processed under PJC module.

In this blog we are going to discuss about the Contract Structure screen of Sage 300 PJC module.

A contract structure determines the number of segments in a contract number, the order in which the segments appear, and the position and type of separator and prefix characters in a contract number. You can define several contract structures, so that you can use several different contract number formats.

Before you add contract structures, you must use the Segments tab on the Options screen to define contract number segments and to specify the separator characters you want to use in contract numbers.

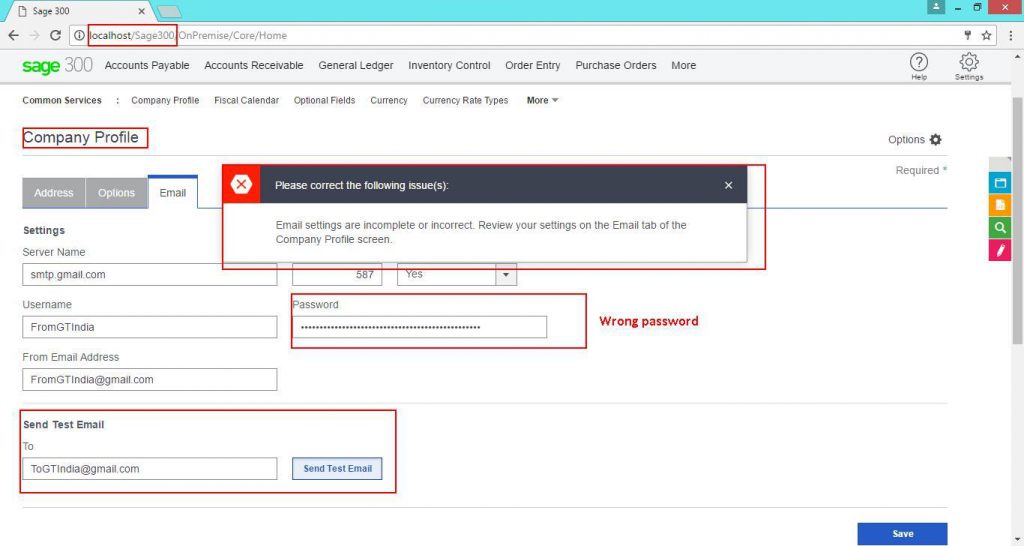
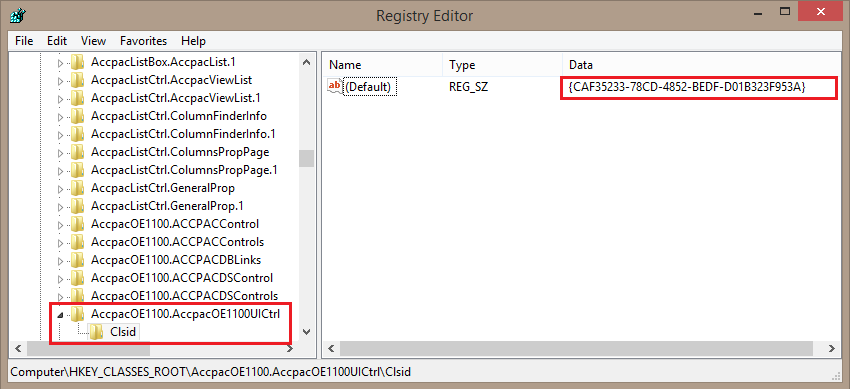
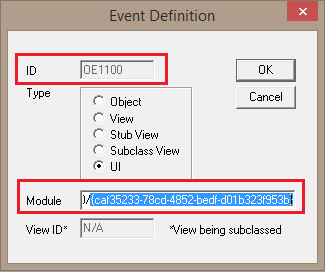
New Stuff: Error: “Control is not properly installed” while opening customized screen in Sage 300 ERP


Summary of the Rules for Contract Numbers

A contract structure can be up to 16 characters long, including all segments, separator characters, and a prefix character.

Contract structures can have from one to five segments. For example, you could use a segment to indicate a type of service, a project manager, or a division of your company.

A segment can be up to 16 characters long, including the optional separator character(s). Keep in mind that contract structures are also limited to 16 characters, so you could have no more than one 16-character segment in a contract structure.

Note: If you decide to use only one segment, you will sacrifice some of the sorting and classification capabilities of the system.

You can use an optional separator character between segments in the contract structure, and you can use an optional prefix character at the beginning of the structure.

Project and Job Costing ignores separator and prefix characters when sorting contract numbers.

Project and Job Costing also ignores separator and prefix characters when distinguishing between contract numbers. For example, the program considers the contract numbers #5200-010 and 5200/010 to be identical, since the only difference is the prefix and separator characters.

Contract numbers may contain blank spaces, such as in the number 22 463 999. The blank space is treated as an alphanumeric character, not as a separator, so that 11_/111/111 and _11/111/111 (where the underscore represents a space) are two difference contract numbers.

The program does not allow you to enter duplicate contract numbers.

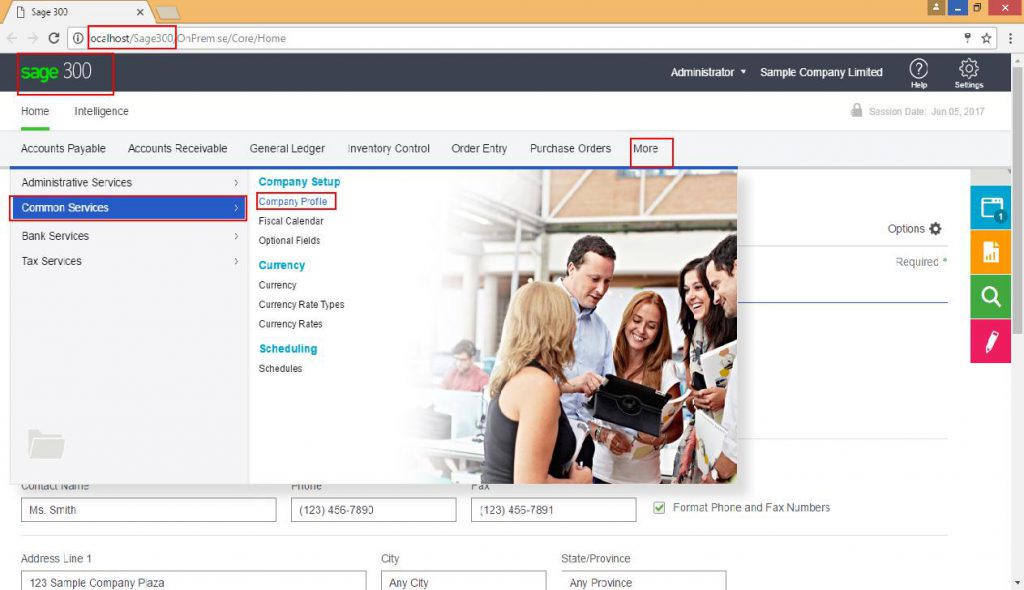
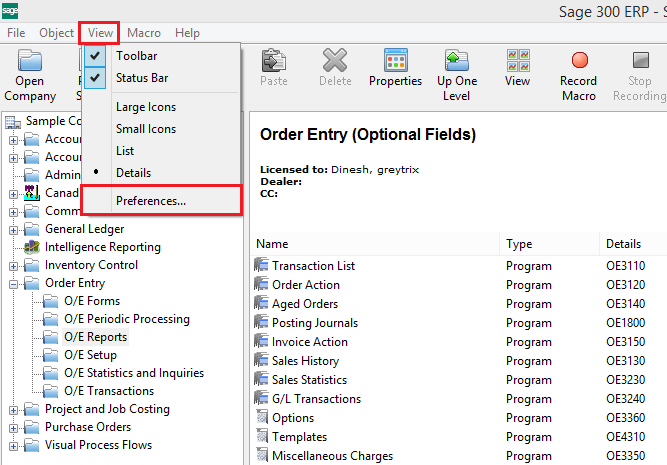
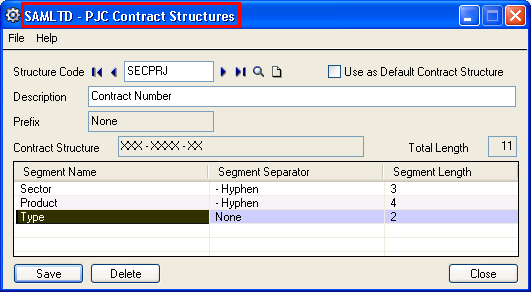
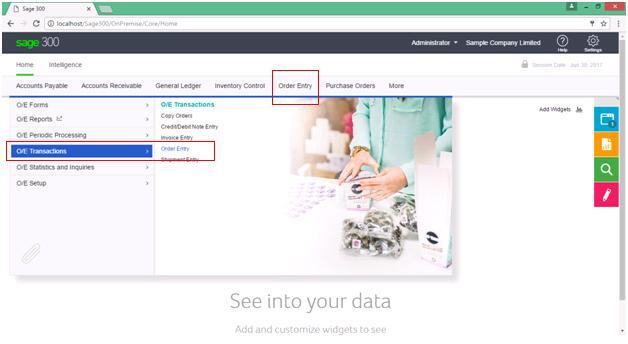
In order to access the screen navigates to Project and Job Costing –> PJC Setup –>Contract Structures. Kindly refer the screenshot for the same.


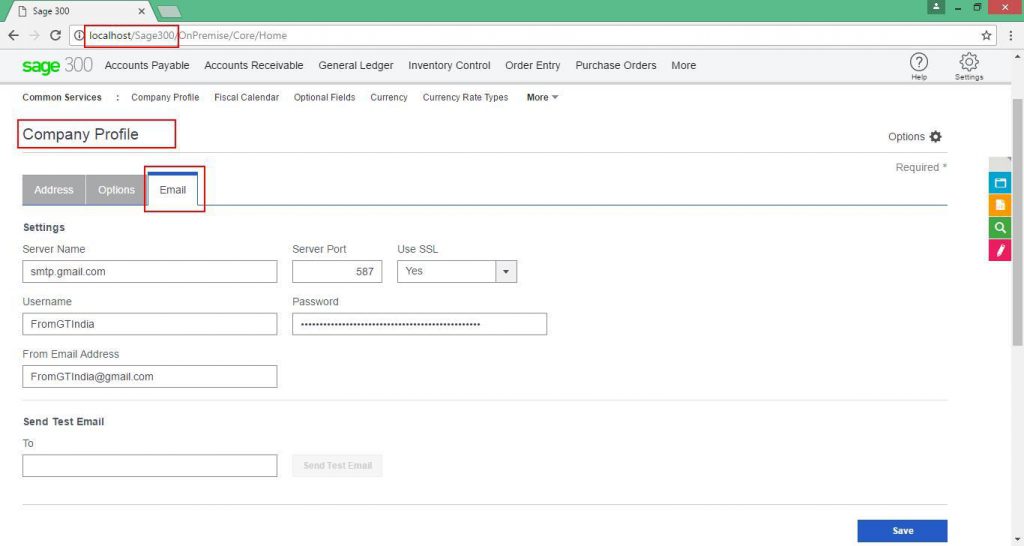
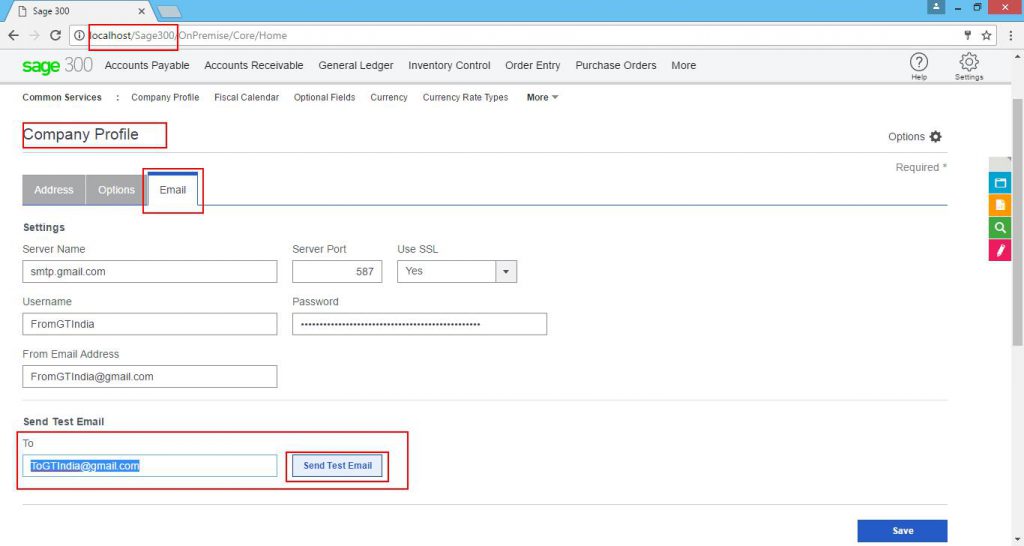
Structure Code:- In the Structure Code field, select an existing Structure Code for the Contract Structures you are entering, or use the options to the right of the field to create a new Structure Code. A Structure Code can be up to 6 alphanumeric characters.

Use as Default Contract Structure: – Check the checkbox to use this structure code as default contract structure.

Description: – Type the description for the contract structure.

Prefix: – If you want to use a prefix at the beginning of contract numbers using this structure, select one from the drop-down list. The program displays only the separators you allow to be used on the PJC Options screen.

Contract Structure: – This field displays the format of Contract Number and it is non editable field.

Total Length: – This field displays the length of contract structure and it is also non editable field.

Segment Name: – This field is used to select the segments. Double click the segment and select one segment from the drop-down list.

Segment Separator: – If you want to use a symbol to separate this segment from the next one in the contract structure, click the Segment Separator field on the same line, then select a symbol from the drop- down list.

The displayed list of separators includes only those symbols you selected for use as segment separators on the PJC Options screen.

Press the insert key to add another segment in a grid. Click the Add button to save the contract structures.

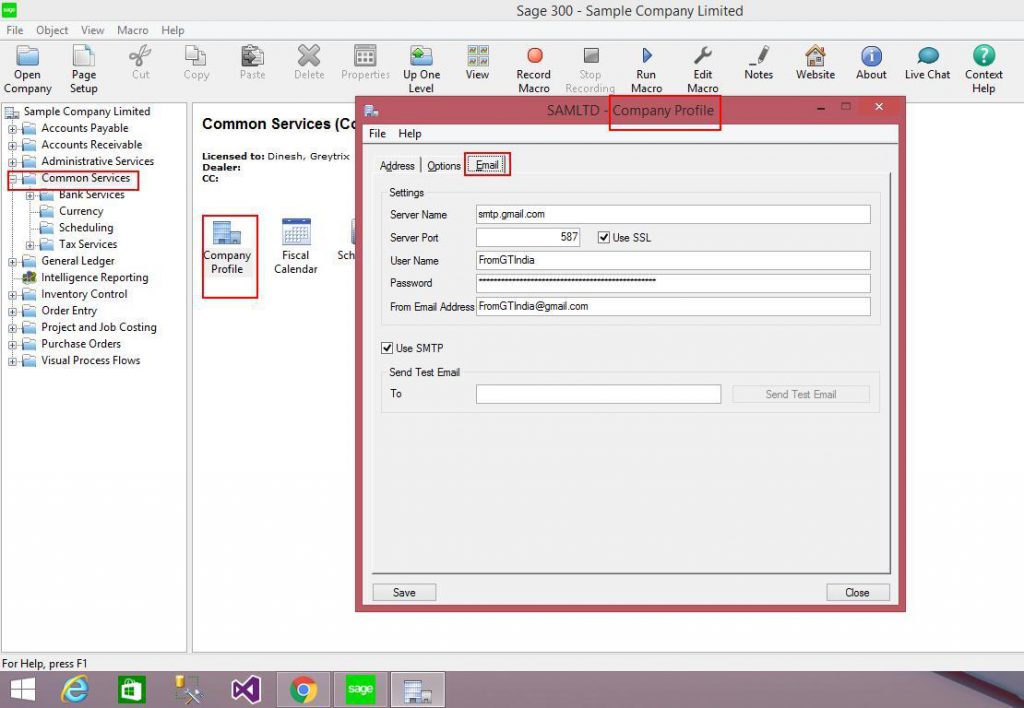
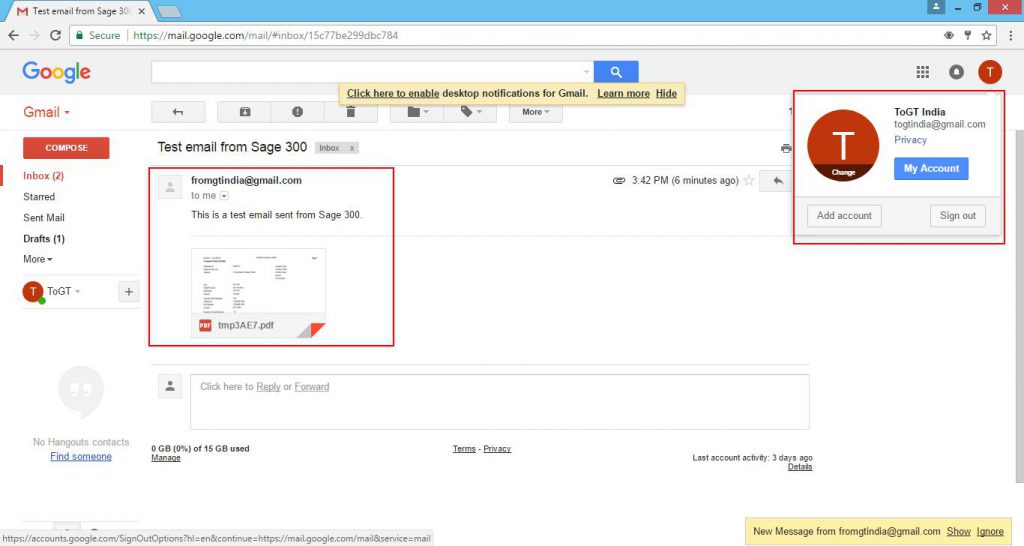
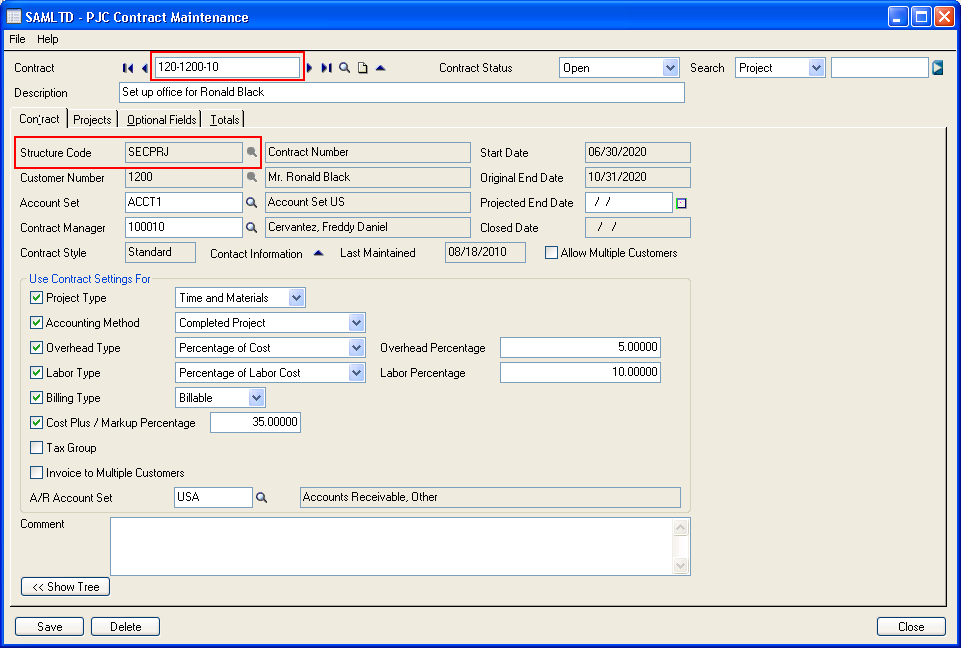
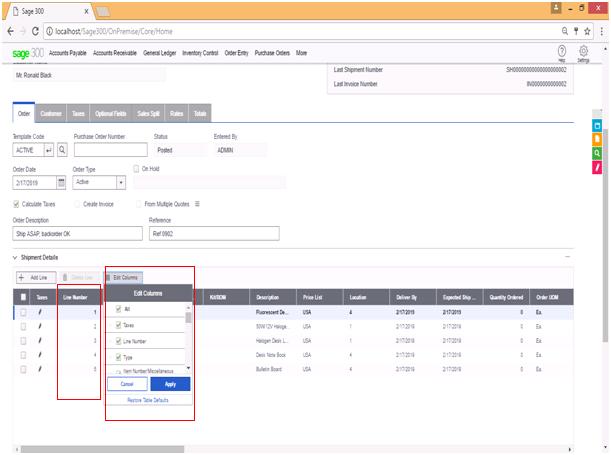
Let us create a contract in Contract Maintenance screen using the above structure code. Kindly refer below screenshot for an example.


Also Read:

  1. Sage 300 PJC – Transaction Numbering
  2. Sage 300 PJC – Posting Date Option
  3. Sage 300 PJC – Option to default AR Invoice Comment Field
  4. Sage 300 PJC – Option to default AR Invoice Description Field
  5. Sage 300 PJC – Option to default Create AR Invoice Batch By

About Us

Greytrix is one stop solution provider for Sage ERP and Sage CRM needs. We provide complete end-to-end assistance for your technical consultations, product customizations, data migration, system integrations, third party add-on development and implementation expertise.

Greytrix have some unique solutions of Sage 300 integration with Sage CRM, Salesforce.com and Magento eCommerce along with Sage 300 Migration from Sage 50 US, Sage 50 CA, Sage PRO, QuickBooks, Sage Business Vision and Sage Business Works. We also offer best-in-class Sage 300 customization and development services to Sage business partners, end users, and Sage PSG worldwide.

For more details on Sage 300 Services, please contact us at accpac@greytrix.com. We will be glad to assist you.

Alternate solution to License Issue in Sage 300 ERP

$
0
0

While opening the Sage 300 ERP , many times we are facing an issue related to the product License.In this blog we are going to discuss an alternate solution to resolve this issue in detail :

New Stuff: New Feature with Sage 300 v2017 Patch 2 for Email Settings on Company Profile

Solution :

1.Go to the Program Directory i.e. C:\Program Files (x86)\Sage\Sage 300 ERP\Runtime where Sage 300 is installed and search the executable A4WLicMgr.exe.

2.Double click on A4WLicMgr application.

3.Click on Licenses tab. Check the Status for all module if status is Expired ,Activate the Module which you want to activate and make sure that SystemManager module should be Activated.

4.After activating the module open command prompt as Administrative right and run regacc command and after that login Sage in Administrative right.

In this way you can resolve the Product license issue.

Also read:

  1. Solution to License Issue in Sage 300 ERP
  2. Business Intelligence Security and License Managers in Sage 300
  3. LanPak License getting used to create a XAPI Session
  4. You do not have a license to use this product” Error in Sage 300 ERP
  5. License information for this component not found


About Us

Greytrix is one stop solution provider for Sage ERP and Sage CRM needs. We provide complete end-to-end assistance for your technical consultations, product customizations, data migration, system integrations, third party add-on development and implementation expertise.

Greytrix have some unique solutions of Sage 300 integration with Sage CRM, Salesforce.com and Magento eCommerce along with Sage 300 Migration from Sage 50 US, Sage 50 CA, Sage PRO, QuickBooks, Sage Business Vision and Sage Business Works. We also offer best-in-class Sage 300 customization and development services to Sage business partners, end users, and Sage PSG worldwide.

For more details on Sage 300 Services, please contact us at accpac@greytrix.com. We will be glad to assist you.

Migrate Sales Credit Note from Sage Pro to Sage 300 ERP

$
0
0

GUMU™ for Sage Pro ERP to Sage 300 ERP is a Sage certified Migration solution. Greytrix is a pioneer in providing Migration services at its Sage Migration Center and catering end-user business requirements. We at Greytrix are focused to help the end –user in successfully implementing the new Sage 300 ERP system through our various successful migration and integration solutions.

We provide data Migration Services from Sage Pro ERP to Sage 300 ERP (formerly known as Sage Accpac) at our Sage Migration Center. Our GUMU™ migration utility is compatible to convert all Master and Open transactions along with Sales, Purchase and GL historical data from Sage Pro ERP to Sage 300 ERP.

New Stuff: Migrate Sales Invoice from Sage 50 US to Sage 300 ERP

Now, we will discuss about migrating Sales Credit Notes from Sage Pro ERP to Sage 300 ERP in our ERP Migration services. Let’s have a quick look on the Sage Pro Sales Credit Note screen.

Here is the converted Sales Credit note from Sage Pro to sage 300. Kindly refer the below screenshot from below path:  Navigate to Order Entry -> O/E Transactions -> Credit/Debit Note Entry.

Once you do the IC Day end processing in Sage 300, the above Sales Transaction gets created into AR module as Credit note.

In this way, Sage Pro Sales Credit Note is migrated into target Sage 300 ERP company database.

About Us:
Greytrix is one stop solution provider for Sage ERP and Sage CRM needs. We provide complete end-to-end assistance for your technical consultations, product customizations, data migration, system integrations, third party add-on development and implementation expertise.

Greytrix helps in migrating to Sage 100, Sage 300 and Sage X3 from Sage Pro, Sage 50 US, Sage 50 CA, Sage 50 Usage Business Works, Sage Business Vision and QuickBooks.

For more information on migration solutions, please contact us at erpmig@greytrix.com. We will be glad to assist you.

Also Read:

1) How to purge Data in Sage 50 CAD (Simply Accounting)
2) How to Purge Sage 50 US (Peachtree) Data
3) Migrate Sage Pro GL Accounts to Sage 300 ERP
4) Migrate AP Invoice from Sage Pro to Sage 300 ERP
5)  Migrating your Sage Pro Company Database to Sage 300 ERP using GUMU Migration services


Automation on PO Quantity

$
0
0

Recently we had a chance to work on automation on purchase order quantity where our customer was looking for the P/O Screen to add two columns and a multiplication of both the new column would calculate order quantity. Essentially, they need the purchase order Qty. column to be calculated by two additional columns Length and No. of Sheets. The Length column should be populated by an Optional Field in the item record and the No. of Sheets column will be manual and editable so that user can enter a required value in it.

New Stuff: Migrate Sales Credit Note from Sage Pro to Sage 300 ERP

In this blog, we would be discussing about automation of Purchase Order Quantity in detail.

In order to calculate the purchase order quantity automatically we need to follow the process below.

1. We have used the Item Master optional fields for storing the characteristic of the Item i.e. Length.

2. We have applied “LENGTH” optional field to I/C Item and at the Order Detail so that it gets flowed from Item master to Order details.

3. We have assigned the “LENGTH” optional field to Item “A1-103/0” with value 3.30.

IC Item

We need to apply the Length optional field to Purchase Order detail as well, refer the screenshot below.

PO Optional field
4. If user selects the item in the purchase order detail line which has optional field “LENGTH” applied in I/C Item will carry the value of “LENGTH” to the purchase order detail optional field. Refer the screenshot below.

PO Optional field setting5. As per the customization request “No. of Sheets” and the “Length” are the new fields which we have added into the purchase order detail line. The value from the purchase order detail optional field will be automatically copied into the new field i.e. “Length”.

6. In the purchase order below user inputs 2.00 into no. of sheets and 3.30 is value of Length so 3.30 * 2.00 = 6.6000. The quantity order gets calculated automatically. Refer the screenshot below.

Purchase order screen

This customization is available for Sage 300 v2016.

Also Read:-

1.   Alternate solution to License Issue in Sage 300 ERP
2.   Significance of using Contract Structures screen in Sage 300 PJC
3.   Error: “Control is not properly installed” while opening customized screen in Sage 300 ERP
4.   Confirm On Print Preferences in Sage 300
5.   New Feature with Sage 300 v2017 Patch 2 for Email Settings on Company Profile

About Us

Greytrix is one stop solution provider for Sage ERP and Sage CRM needs. We provide complete end-to-end assistance for your technical consultations, product customizations, data migration, system integrations, third party add-on development and implementation expertise.
Greytrix have some unique solutions of Sage 300 integration with Sage CRM, Salesforce.com and Magento eCommerce along with Sage 300 Migration from Sage 50 US, Sage 50 CA, Sage PRO, QuickBooks, Sage Business Vision and Sage Business Works. We also offer best-in-class Sage 300 customization and development services to Sage business partners, end users, and Sage PSG worldwide.
For more details on Sage 300 Services, please contact us at accpac@greytrix.com. We will be glad to assist you.


Material Reservation/MO Report

$
0
0

Enterprise Resource Planning is an important enterprise application that integrates all the individual department functions into a single software application.

ERP makes it easier to track all the information and transactions that are done from multiple modules so that the user is able to view all detail in Provided MO screen.

However, sometimes a user may require all item related information from multiple Module on a single screen. For this type of requirement, we have developed a utility called MO Report that displays the data like item number, Open PO Quantity, Transferred Quantity according to filter criteria applied by the user.

New Stuff: Automation on PO Quantity

This report has been developed for one of our client with a required filter criteria (filter criteria may change as per your requirement)

Filter:-
• from and to Item number
• from and to Location (we will consider Location finder for on hand Quantity only)

Suppose a user selects from and to item from finder with location from and to once user clicked on processing button then below field display with respective values:

  • Item number:- this will be component number field from MO Screen
  • On Hand Qty:- item on hand Quantity as per selection of Location
  • Reservation:- Required Qty field from MO order Material tab
  • Open Po:- sum of Open Po Qty
  • Available to Use:- calculated as On Hand – Reservation – Transferred Qty
  • Transferred Qty :- Transferred Qty field

Refer below screen

As per the above screen all item related Information like item No, On hand Quantity, Reservation Quantity, transferred Quantity etc. user can able to Read all the data from single provided Mo screen.

If you observe carefully, we are displaying total sum of quantity in each column that have multiple transactions for respective item. To know the summary of total number of transactions for particular item, you just need to click on total quantity column & you will get one pop-up window which will show you total number of transactions exists for respective item.

Please Refer below screen for more clarification:-


NOTE: – We have provided this functionality (Pop-up) on Reservation, Open PO, Transferred fields.

With the help of this utility, user can keep record from multiple modules using single Utility.

Also Read

  1. Significance of using Contract Structures screen in Sage 300 PJC
  2. Manufacturers Item Number in Sage 300 ERP
  3. Easily Search item Option in manufacturing Order detail
  4. Manufacturing Excise Process


Material Reservation/MO Report

$
0
0

Enterprise Resource Planning is an important enterprise application that integrates all the individual department functions into a single software application.

ERP makes it easier to track all the information and transactions that are done from multiple modules so that the user is able to view all detail in Provided MO screen.

However, sometimes a user may require all item related information from multiple Module on a single screen.For this type of requirement, we have developed a utility called MO Report that displays the data like item number, Open PO Quantity, Transferred Quantity according to filter criteria applied by the user.

New Stuff: Automation on PO Quantity

This report has been developed for one of our client with a required filter criteria (filter criteria may change as per your requirement)

Filter:-
• from and to Item number
• from and to Location (we will consider Location finder for on hand Quantity only)

Suppose a user selects from and to item from finder with location from and to once user clicked on processing button then below field display with respective values:

  • Item number:- this will be component number field from MO Scree
  • On Hand Qty:- item on hand Quantity as per selection of Location
  • Reservation:- Required Qty field from MO order Material tab
  • Open Po:- sum of Open Po Qty
  • Available to Use:- calculated as On Hand – Reservation – Transferred Qty
  • Transferred Qty :- Transferred Qty field

Refer below screen

As per the above screen all item related Information like item No, On hand Quantity, Reservation Quantity, transferred Quantity etc. user can able to Read all the data from single provided Mo screen.

If you observe carefully, we are displaying total sum of quantity in each column that have multiple transactions for respective item. To know the summary of total number of transactions for particular item, you just need to click on total quantity column & you will get one pop-up window which will show you total number of transactions exists for respective item.

Please Refer below screen for more clarification:-

NOTE: – We have provided this functionality (Pop-up) on Reservation, Open PO, Transferred fields.

With the help of this utility, user can keep record from multiple modules using single Utility.

Also Read:-

  1. Significance of using Contract Structures screen in Sage 300 PJC
  2. Manufacturers Item Number in Sage 300 ERP
  3. Easily Search item Option in manufacturing Order detail
  4. Manufacturing Excise Process

AR Invoice Import Utility

$
0
0

Enterprise resource Planning or ERP is a solution for organisations to manage their business efficiently. The main application of an ERP Software is to collect and organise data from various levels and provide the management a clear picture of profit and loss.

New Stuff:- Material Reservation/MO Report

Discussing about PO, AR, IC, GL module, let us take an example Account Receivable. Let us say a user has created number of Batches and Entries in Account Receivable or we can say user has saved those data in Excel or somewhere as per requirement but due to some other issues System it is damaged.

Now, how user can Retrieve all those Information to Sage 300?

We have solution to retrieve all those data from Excel Sheet to Sage 300. In Sage 300 ERP, we have developed a new utility to import Number of Batches using a single User Interface (we will Consider Only AR- INV, AR-CREDIT, AR-DEBIT Transaction)

Refer Below screen:-

User needs to select Excel file using Select Path file Option and Utility will work and System generate Batches automatically based on data entered in Selected Excel sheet

Note: – Import file format will be excel and Entry type will be Summary while creating automated batches

The Import format is as follows:-

While importing, multiple batches will create depends on state code mentioned in 1st column in excel sheet.

At the time of creating Excel file user need to take care of below Points:-

  • Company (Name of the Company)
  • Batch Description :– (Batch Description)
  • Entry No:- (entry number of respective batch)
  • Entry Desc:- (This will be entry description)
  • Customer:- (Valid Customer number)
  • Doc Type :- (1 – Invoice , 2 – Debit Note, 3 – Credit Note)
  • Apply to Document:- (This field be use only in case of Credit & Debit Note)
  • Document Date:- (yyyyMMDD)
  • Post Date:- (yyyyMMDD)
  • Document No:- (document number of respective entry.)
  • PO No:- (PO Number of respective entry)
  • Order No:- (Order Number of respective entry)
  • Ship No:- (Shipment Number of respective entry)
  • Spcl Instruction:- (special instruction of respective entry)
  • Description:- (detail line description )
  • Revenue Account:- (detail line revenue account.)
  • Amount:- (detail line amount)

The main purpose to write this blog is that the user can retrieve all the Information (batches) at a time using Single Interface. This Utility will be helpful to Import N numbers of Record to Sage 300.


About Us:

Greytrix is one stop solution provider for Sage ERP and Sage CRM needs. We provide complete end-to-end assistance for your technical consultations, product customizations, data migration, system integrations, third party add-on development and implementation expertise.

Greytrix have some unique solutions of Sage 300 integration with Sage CRM, Salesforce.com and Magento eCommerce along with Sage 300 Migration from Sage 50 US, Sage 50 CA, Sage PRO, QuickBooks, Sage Business Vision and Sage Business Works. We also offer best-in-class Sage 300 customization and development services to Sage business partners, end users, and Sage PSG worldwide.

For more details on Sage 300 Services, please contact us at accpac@greytrix.com. We will be glad to assist you.


Also Read:-

Auto-Update Bill-To-Address for Open Orders in Sage 300 ERP

$
0
0

Recently we have done a customization on A/R Customer screen to auto update the Bill-To-Address where our customer was looking for updating the Bill-To-Address for all the open orders when saving the changes in the customer’s address.

New Stuff:  AR Invoice Import Utility

In this blog, we would be discussing about functionality of auto updating the Bill-To-Address.

Step 1:

User makes some changes in the Address for the customer. We have selected the customer 1100  from the Sample Database and added the new address line “Customer Address Line 3” and Saved the changes.
While saving the changes the user is prompted for updating all the open Orders.

AR Customer Screen

Step 2:

When the user selects the “Yes” from the prompt then the Bill-To-Address for all the open orders with customer “100” is updated. User is provided the message box with the number of orders updated and the updated order numbers are stored in the LogFile generated with current system date on the displayed path.

AR Customer message pop up

Step 3:

The update information is displayed in the Log file.

Log File

Step 4:

When we verify the order “ORD000000000092” from the Log file, we can see that the new changes in the Address of the customer is reflected for the order. User can click on ZOOM button to check for Bill-To-Address besides the cutomer number.

Order entry screen

So, customization is very useful when the address information for the specific customer is changed and the customer demands to Bill to the new address for the orders that are still pending.

Also Read:

  1. Update Bill-To-Address and Ship-To Address on OE Order Entry Screen
  2. Automation on OE Order Quantity
  3. A/R Customer List Screen
  4. Change Customer Number on Sales order after posting
  5. Auto Vendor / Customer Code Generation in Sage 300 ERP

About Us

Greytrix is one stop solution provider for Sage ERP and Sage CRM needs. We provide complete end-to-end assistance for your technical consultations, product customizations, data migration, system integrations, third party add-on development and implementation expertise.

Greytrix have some unique solutions of Sage 300 integration with Sage CRM, Salesforce.com and Magento eCommerce along with Sage 300 Migration from Sage 50 US, Sage 50 CA, Sage PRO, QuickBooks, Sage Business Vision and Sage Business Works. We also offer best-in-class Sage 300 customization and development services to Sage business partners, end users, and Sage PSG worldwide.

For more details on Sage 300 Services, please contact us at accpac@greytrix.com. We will be glad to assist you.

Auto-Update Ship-To-Address for Open Orders in Sage 300 ERP

$
0
0

Recently we have done a customization on A/R Ship To Locations screen to auto update the Ship-To-Address where our customer was looking for updating the Ship-To-Address for all the open orders when saving the changes for the specific location address of the customer.

New Stuff:  Auto-Update Bill-To-Address for Open Orders in Sage 300 ERP

In this blog, we would be discussing about functionality of auto updating the Ship-To-Address.

Step 1:

User makes some changes in the Address for the customer’s location. We have selected the customer 1200 and Location “WAREHS” from the Sample Database and added the new address line “Address Line 3” and Saved the changes.
While saving the changes the user is prompted for updating all the open Orders.

A/R Ship to location

Step 2:

When the user selects the “Yes” from the prompt then the Ship-To-Address for all the open orders with customer “1200” and Ship To Locations “WAREHS” is updated. User is provided the message box with the number of orders updated and the updated order numbers are stored in the LogFile generated with current system date on the displayed path.

Pop Up Message

Step 3:

The update information is displayed in the Log file.

Log File

Step 4:

When we verify the order “ORD000000000001” from the Log file, we can see that the new changes in the Address of the customer’s Ship Location is reflected for the order. User can click on ZOOM button to check for Ship-To-Address besides the Ship-To-Locations.

Order entry screen

So, customization is very useful when the address information for the specific location of the customer is changed and the customer demands to ship the item to the new address for the orders that are still pending.

Also Read:

  1. Update Bill-To-Address and Ship-To Address on OE Order Entry Screen
  2. Migrating Customer Ship to Address from Sage Pro to Sage 300
  3. Automation on OE Order Quantity
  4. Setting default primary Ship to Location in Sage 300
  5. Migrating Customer Ship to Address from QuickBooks to Sage 300 ERP

About Us

Greytrix is one stop solution provider for Sage ERP and Sage CRM needs. We provide complete end-to-end assistance for your technical consultations, product customizations, data migration, system integrations, third party add-on development and implementation expertise.

Greytrix have some unique solutions of Sage 300 integration with Sage CRM, Salesforce.com and Magento eCommerce along with Sage 300 Migration from Sage 50 US, Sage 50 CA, Sage PRO, QuickBooks, Sage Business Vision and Sage Business Works. We also offer best-in-class Sage 300 customization and development services to Sage business partners, end users, and Sage PSG worldwide.

For more details on Sage 300 Services, please contact us at accpac@greytrix.com. We will be glad to assist you.


Checking a customer credit status in sage web screen-patch 2

$
0
0

With the release of Sage 300 v2017 and new web screen, some new features has been introduced. In this blog we will look how to check customer credit status in sage 300 web screen.

New Stuff: Auto-Update Ship-To-Address for Open Orders in Sage 300 ERP

A new credit status tab on AR customer has been introduced in sage 300 web screen patch 2 i.e. in Product update 2.This Credit status tab displays credit status, outstanding balances, and other credit-related information for customers and national accounts.

User can utilize the Credit Status tab on the A/R Customers screen to look up the following information:

1. The balance outstanding in Accounts Receivable for the customer and the national account (if the customer is a member of a national account).

2. Pending balance for the customer in Accounts Receivable, Order Entry, or third-party programs that integrate with Accounts Receivable, if credit-check options include transactions pending in those programs.

3. Retainage outstanding for the customer, if you use retainage accounting in Accounts Receivable.

4. The overdue balance that exceeds the threshold specified for the customer outstanding transaction balances.

5. The number of open invoices, the total invoices paid to date, and the total and average number of days to pay them.

Web Screen- AR Customer Credit status

User can follow below steps to check credit information for a customer:

1. Open Accounts Receivable > A/R Customers > Customers.

2. In the Customer Number field, enter the customer number, and then press Tab.

3. Click the Credit Status tab.

Account receivable module

4. The screen also present with some filters. User can specify filter criteria for documents, and then click Apply button to display record according to criteria selected.

  • Aged By.-This option is specify whether to age documents by due date or by document date.
    • Due date: Current transactions are those with due dates that are later than the Age As Of date. The first period starts with one day past the due date.
    • Document date: The first period includes transactions with document dates that are earlier than the Age As Of date. Current transactions are those with the same or later date than the Age As Of date.
  • Age as of: – This option is specify the date as of which you want to age transaction balances (such as by todays date or the last statement date).
  • Cutoff Date: – This option is specify a cutoff date, so user can include or exclude transactions that are more recent than the “As Of” date.
  • Include Payments: – This option is specify whether to age amounts from prepayments that have not been applied to specific documents, or include them all in the current period. Applied amounts are always included in the same aging periods as the documents to which they apply.

AR Customer

So this is the useful feature of Sage 300 C through which we can effortlessly check the customer details

Also Read

  1. How to hide Sage 300 Web Screens using UI Profiles
  2. New Notes feature in Sage 300 Web screens
  3. Troubleshoot: Error while configuring the Sage 300 Web Screens
  4. Sage 300c Web Screens Installation
  5. A/R Customer List Screen

About Us

Greytrix is one stop solution provider for Sage ERP and Sage CRM needs. We provide complete end-to-end assistance for your technical consultations, product customizations, data migration, system integrations, third party add-on development and implementation expertise.

Greytrix have some unique solutions of Sage 300 integration with Sage CRM, Salesforce.com and Magento eCommerce along with Sage 300 Migration from Sage 50 US, Sage 50 CA, Sage PRO, QuickBooks, Sage Business Vision and Sage Business Works. We also offer best-in-class Sage 300 customization and development services to Sage business partners, end users, and Sage PSG worldwide.

For more details on Sage 300 Services, please contact us at accpac@greytrix.com. We will be glad to assist you.

Add Report Links in Sage 300 2017 C

$
0
0

In desktop versions of sage 300 we are able to create shortcut of the reports by simply right clicking on the sage 300 desktop like (Right click => New => Report). Here in sage 300 2017 C adding report to the screen as a shortcut is more flexible and simple.

New Stuff : Checking a customer credit status in sage web screen-patch 2

In this blog, we would be discussing about creating shortcut of the crystal report at sage 300 2017 C. We need to follow the steps below to execute the crystal report.

1. Copy the desired “.rpt” file into the folder named as “Report” available at sage 300 program directory. Please find the below screenshot for your reference.

ReportLink2. Click on the Report button available on the sage 300 web screen located at right side. Please find the below screenshot for your reference.

Sage 300 c desktop3. On click of Report button below screen will be opened.

ReportLink4. Now we need to select the report which is to be printed as shortcut.

ReportLink5. Now click the save button to save the selected report.
ReportLink

6. Click on the Report and selected report will get opened on sage 300 2017 C web screen.

Report Link Widget

7. Below is the report we have selected to print.

Report Link

So following the simple steps we can add report shortcuts to Sage 300 2017 C desktop.

Also Read:-

1.  Notes in Sage 300 2017
2.  Greytrix Bill of Lading for Sage 300 ERP Version 2017
3.  Document Attach for Sage 300 ERP 2017 released now
4.  New Feature with Sage 300 v2017 Patch 2 for Email Settings on Company Profile
5.  Auto-Update Ship-To-Address for Open Orders in Sage 300 ERP

About Us

Greytrix is one stop solution provider for Sage ERP and Sage CRM needs. We provide complete end-to-end assistance for your technical consultations, product customizations, data migration, system integrations, third party add-on development and implementation expertise.

Greytrix have some unique solutions of Sage 300 integration with Sage CRM, Salesforce.com and Magento eCommerce along with Sage 300 Migration from Sage 50 US, Sage 50 CA, Sage PRO, QuickBooks, Sage Business Vision and Sage Business Works. We also offer best-in-class Sage 300 customization and development services to Sage business partners, end users, and Sage PSG worldwide.

For more details on Sage 300 Services, please contact us at accpac@greytrix.com. We will be glad to assist you.


Migrate Product Line from Sage 100 ERP to Sage 300 ERP

$
0
0

GUMU™ for Sage 100 ERP to Sage 300 ERP is a Sage certified Migration solution. Greytrix is a pioneer in providing migration services at its Sage Migration Centre and catering end-users business requirements.

Data migration is always a challenging task to perform. We migrate data with help of our Sage certified migration utility in accordance to our well defined migration process.

In this blog we will discuss about how GUMU™ migrates Product Line from Sage 100 ERP to Sage 300 ERP (Formerly known as Accpac).

New Stuff: Migrate Sales Invoice from Sage 50 US to Sage 300 ERP

Now, we will discuss about migrating Product Lines from Sage 100 ERP to Sage 300 ERP in our ERP Migration services. Let’s have a quick look on the Sage 100 ERP Product Line screen.
You can see the list of Product Line in Sage 100 ERP from the following path:
Inventory Management–>Setup–>Product Line Maintenance (Refer below screenshot)

In the below screenshot you can see the product line is assigned to Item masters.

In the migration process we convert Product Line of Sage 100 ERP data as a category Code in Sage 300 ERP (refer below screenshot).

In the below screenshot you can see that the category code is assigned to item master in Sage 300 ERP.

In the above mentioned ways the item category code gets converted into Sage 300 ERP.

About Us:

Greytrix is one stop solution provider for Sage ERP and Sage CRM needs. We provide complete end-to-end assistance for your technical consultations, product customizations, data migration, system integrations, third party add-on development and implementation expertise.

Greytrix have some unique solutions of Sage 100 integration with Sage CRM, and Salesforce.com  along with Sage 100 Migration from Sage 50 US, QuickBooks, Sage Business Vision and Sage Business Works. We also offer best-in-class Sage 100 customization and development services to Sage business partners, end users, and Sage PSG worldwide.

For more details on Sage 100 Services, please contact us at sage@greytrix.com. We will be glad to assist you.

Also Read:

1) Migrate Item Masters from Sage 100 ERP to Sage 300 ERP
2) Migrate Vendors from Sage 100 ERP to Sage 300 ERP
3) Migrate Banks from Sage 100 ERP to Sage 300 ERP
4) Migrate Banks from QuickBooks to Sage 100 ERP


Sage 300C – “Edit Columns” Functionality for Hiding or Restoring Columns on Grid

$
0
0

Providing user friendly interface is always important for any software or website. It will definitely useful for making data entry easy which will in turn speeds up the overall process and facilitate the easier interactions with screen.

Sage 300 C also provides many features to make the interface more interactive for users. It allows user to set certain options for the fields appearing on the screen. In this blog we are going to discuss one of such features related to provision for editing the list of columns that will appear on the grid.

New Stuff:Migrate Product Line from Sage 100 ERP to Sage 300 ERP

You can find this feature provided on any screen that contains grid to present transaction detail part. Here we will consider for example OE Order entry screen.
In order to access the screen navigates to Order Entry –> Order Transactions –> Order Entry. Kindly refer to the screenshot below for the same.

Order entry

The below user interface for order entry will get opened:

Order screen Edit screen

Edit Column

As displayed in above screenshots an additional “Edit Columns” button will be provided. User can click this button to open the list of “Columns” which are present on the grid. Along with names of the columns check box is also provided for the selection. User can select /deselect any column out of these to hide/display the same.

E.g. As you can see in the screenshot above “Line Number” field is visible you can hide the same by deselecting the checkbox in the list and clicking on apply button.

Order screen -> Edit Column

EditColIumn

As you can see in the above screenshot the column “Line Number” is not visible now. User can again add the same whenever he/she want by following same procedure.

Note:

  • User can change the same any time also can be able to reset it to default as per standard by clicking “Restore Table Defaults”.
  • These changes are user specific so the different user can set the columns to be viewed as per their preferences.
  • This functionality is also available on standard “Finder” popup screens.

Also read:

  1. Improve your Company’s Performance with Sage 300c
  2. Sage 300c Web Screens Installation
  3. Troubleshoot: Error while configuring the Sage 300 Web Screens
  4. Difference between Sage 300 Portal and the new Web Screens
  5. How to hide Sage 300 Web Screens using UI Profiles.

About Us

Greytrix is one stop solution provider for Sage ERP and Sage CRM needs. We provide complete end-to-end assistance for your technical consultations, product customizations, data migration, system integrations, third party add-on development and implementation expertise.

Greytrix have some unique solutions of Sage 300 integration with Sage CRM, Salesforce.com and Magento eCommerce along with Sage 300 Migration from Sage 50 US, Sage 50 CA, Sage PRO, QuickBooks, Sage Business Vision and Sage Business Works. We also offer best-in-class Sage 300 customization and development services to Sage business partners, end users, and Sage PSG worldwide.

For more details on Sage 300 Services, please contact us at accpac@greytrix.com. We will be glad to assist you.

Create Single Invoice Entry from Multiple Receipt Entry in Sage 300 ERP

$
0
0

In this blog we going to discuss about feature present in Sage 300 i.e. “Create Single Invoice from Multiple Receipt Entry”. Sometime Sage 300 user wants to generate the single invoice for multiple receipts generated for the single vendor, to handle this, Sage 300 ERP provide an option to create a single invoice against multiple receipts by checking the From Multiple Receipts Checkbox in P/O Invoice Entry.

New Stuff: – Sage 300C – “Edit Columns” Functionality for Hiding or Restoring Columns on Grid

Follow below mentioned steps to create a single Invoice from Multiple receipt entry:

1. Navigate to Purchase Orders -> P/O Transactions -> Invoice Entry

Navigation to P/O Transactions

2. Type the Invoice number in “Invoice Number Field” and select the Vendor in “Vendor Number field”.
3. After selecting the vendor check the checkbox of “From Multiple Receipts” and click the “Zoom” button beside the From Multiple Receipts option.
4. It will popup “P/O Create Invoice from Receipts Screen”. Click the finder to select receipts against which you want to raise Invoice.

P/O Create Invoice from Receipts Screen

5. Selected receipts will be displayed in the grid and ‘Invoice’ button will get enabled.

Pop Up Create Invoice from receipt

6. Click on Invoice button. All line items from selected receipts will get filled into the Invoice detail grid.
7. Receipt Number getting displayed in “Receipt Number field” was first selected in the “P/O Create Invoice from Receipts Screen”.

PO Invoice

Also Read:-

  1. Creating Single Sales Order from Multiple Sales Quotes in Sage 300 ERP
  2. Creating Single Shipment entry from Multiple Sales Orders in Sage 300 ERP
  3. Creating Single Receipt Entry from Multiple Purchase Order in Sage 300 ERP
  4. Create Single Invoice Entry from Multiple Shipment Entry in Sage 300 ERP
  5. Creating Multiple Invoice Entry from a single Receipt in Sage 300 ERP

About Us

Greytrix is one stop solution provider for Sage ERP and Sage CRM needs. We provide complete end-to-end assistance for your technical consultations, product customizations, data migration, system integrations, third party add-on development and implementation expertise.

Greytrix have some unique solutions of Sage 300 integration with Sage CRM, Salesforce.com and Magento eCommerce along with Sage 300 Migration from Sage 50 US, Sage 50 CA, Sage PRO, QuickBooks, Sage Business Vision and Sage Business Works. We also offer best-in-class Sage 300 customization and development services to Sage business partners, end users, and Sage PSG worldwide.

For more details on Sage 300 Services, please contact us at accpac@greytrix.com. We will be glad to assist you.

Sage 300 – Resolution for error while accessing executable from Mapped Drive

$
0
0

In this blog we are going to discuss one issue which may occur while accessing the executable on workstation machine from the server machine.  The below error message occurs if the path for the executable is set using mapped drive while adding executable on the workstation.

As you can see in the below screenshot the  “Details.exe” is added to Sage 300 desktop by accessing executable file from server using mapped drive  “Z:”.

New Stuff:- Create Single Invoice Entry from Multiple Receipt Entry in Sage 300 ERP

Mapped Drive

As on Desktop version of Sage 300 workstation we cannot access the executable from server using mapped drive, the user is getting below error while running this executable from the workstation.

Error pop up  screen

The solution to this is we can add the executable file using network path instead of using mapped drive.Since the Sage 300 desktop can be able to access the network path executable works fine on workstation as well.

Also read:

  1. Alternate solution to License Issue in Sage 300 ERP
  2. Solution to License Issue in Sage 300 ERP
  3. How to Resolve Help screen issue on Sage workstation
  4. Cannot Issue an OE Credit Note to return a serialized item to a different location
  5. Error: “Control is not properly installed” while opening customized screen in Sage 300 ERP

About Us

Greytrix is one stop solution provider for Sage ERP and Sage CRM needs. We provide complete end-to-end assistance for your technical consultations, product customizations, data migration, system integrations, third party add-on development and implementation expertise.

Greytrix have some unique solutions of Sage 300 integration with Sage CRM, Salesforce.com and Magento eCommerce along with Sage 300 Migration from Sage 50 US, Sage 50 CA, Sage PRO, QuickBooks, Sage Business Vision and Sage Business Works. We also offer best-in-class Sage 300 customization and development services to Sage business partners, end users, and Sage PSG worldwide.

For more details on Sage 300 Services, please contact us at accpac@greytrix.com. We will be glad to assist you.

Migrate Item UOM from Sage 100 ERP to Sage 300 ERP

$
0
0

GUMU™ for Sage 100 ERP to Sage 300 ERP is a Sage certified Migration solution. Greytrix is a pioneer in providing migration services at its Sage Migration Center and catering end-users business requirements.

Data migration is always a challenging task to perform. We migrate data with help of our Sage certified migration utility in accordance to our well defined migration process.

In this blog we will discuss about how GUMU™ migrates UOM from Sage 100 ERP to Sage 300 ERP (Formerly known as Accpac).

New StuffMigrate Item Masters from Sage 100 ERP to Sage 300 ERP

Now, we will discuss about migrating UOM (unit of measure) from Sage 100 ERP to Sage 300 ERP in our ERP Migration services. Let’s have a quick look on the Sage 100 ERP UOM screen.
You can see the list of UOM in Sage 100 ERP from the following path:
Sage 100 ERP–>Common Information– Setup–>Unit of Measure Conversion Maintenance (Refer below screenshot)

In the below screenshot you can see the UOM is assigned to Item masters.
In the below screenshot you can see the converted UOM in Sage 300 ERP.

In the below screenshot you could see the UOM is assigned to Item master.

In the above mentioned ways the item UOM gets converted into Sage 300 ERP.

About Us:
Greytrix is one stop solution provider for Sage ERP and Sage CRM needs. We provide complete end-to-end assistance for your technical consultations, product customizations, data migration, system integrations, third party add-on development and implementation expertise.

Greytrix have some unique solutions of Sage 100 integration with Sage CRM, and Salesforce.com  along with Sage 100 Migration from Sage 50 US, QuickBooks, Sage Business Vision and Sage Business Works. We also offer best-in-class Sage 100 customization and development services to Sage business partners, end users, and Sage PSG worldwide.

For more details on Sage 100 Services, please contact us at sage@greytrix.com. We will be glad to assist you.

Also Read:


Viewing all 1488 articles
Browse latest View live